
 4")
Making a sourdough starter from scratch is one of the most rewarding kitchen projects I’ve ever tackled. This sourdough starter recipe uses just two simple ingredients and transforms them into a living, bubbling culture that will become the heart of your homemade bread baking. No commercial yeast needed, just flour, water, and a little patience to create your own wild yeast levain.
I still remember the first time I mixed flour and water in a jar, skeptical that anything magical would happen. But after a few days of feeding my starter, watching it bubble and rise, I was hooked. There’s something deeply satisfying about nurturing this living ingredient, knowing that bakers have been doing the same thing for thousands of years. This sourdough starter recipe is perfect for beginners because it’s incredibly forgiving. Even if you miss a feeding or see some separation, your starter can bounce back. The process teaches you patience and rhythm, and once your starter is mature, you’ll have an endless supply of natural leavening for artisan bread, tangy pancakes, and so much more.
Table of Contents
What You’ll Need to Make Your Sourdough Starter
Before you begin this sourdough starter recipe, I always recommend gathering everything in one place so you’re not scrambling mid-process. You’ll need a clean glass jar with at least a quart of capacity (I prefer wide-mouth jars for easy stirring), a kitchen scale for accuracy, and a warm spot in your kitchen where temperatures stay between 70-80°F. Pro tip: If your kitchen runs cold, try placing your jar on top of the refrigerator or near a warm appliance.
For the Starter:
- 1/2 cup (60g) whole wheat or rye flour (for Day 1 only, helps kickstart fermentation)
- 1/2 cup (60g) all-purpose flour (for ongoing feedings)
- 1/2 cup (120ml) warm water, around 80°F (not hot, which kills yeast – if using heavily chlorinated tap water, let it sit out for 24 hours or use filtered water)
Equipment:
- Glass jar or container (at least 1 quart capacity to prevent overflow as starter rises)
- Kitchen scale (highly recommended for maintaining proper ratios by weight)
- Silicone spatula or wooden spoon
- Lid or cloth cover for the jar
My personal tip: I prefer using a rubber band around the jar to mark the starting height after each feeding. This makes it easy to see when your starter has doubled, which is the key sign of readiness.
 5")
How to Create Your Sourdough Starter Step by Step
I recommend being patient with this process, as building a healthy starter takes time but rewards you with consistent results. The key is maintaining a regular feeding schedule and watching for visual cues that tell you your starter is thriving.
Step 1: Day 1 – Initial Mix In your clean glass jar, combine 1/2 cup (60g) of whole wheat or rye flour with 1/2 cup (120ml) of warm water. Stir thoroughly with your spatula until you see no dry flour bits remaining. The mixture should look like thick pancake batter. Loosely cover the jar with a lid (don’t seal it tight, as gases need to escape) or drape a clean cloth over the top. Place it in a warm spot and let it sit undisturbed for 24 hours. You might see a few bubbles by the end of Day 1, which means wild yeast is starting to wake up.
Step 2: Day 2 – First Feeding After 24 hours, you may notice some bubbles and a slightly sweet, fermented smell. Discard half of your starter (about 1/2 cup or 60g). I know it feels wasteful, but this step is crucial for maintaining the right balance. To the remaining starter, add 1/2 cup (60g) of all-purpose flour and 1/2 cup (120ml) of warm water. Stir until everything is well combined and smooth. Cover loosely and let it rest for another 24 hours.
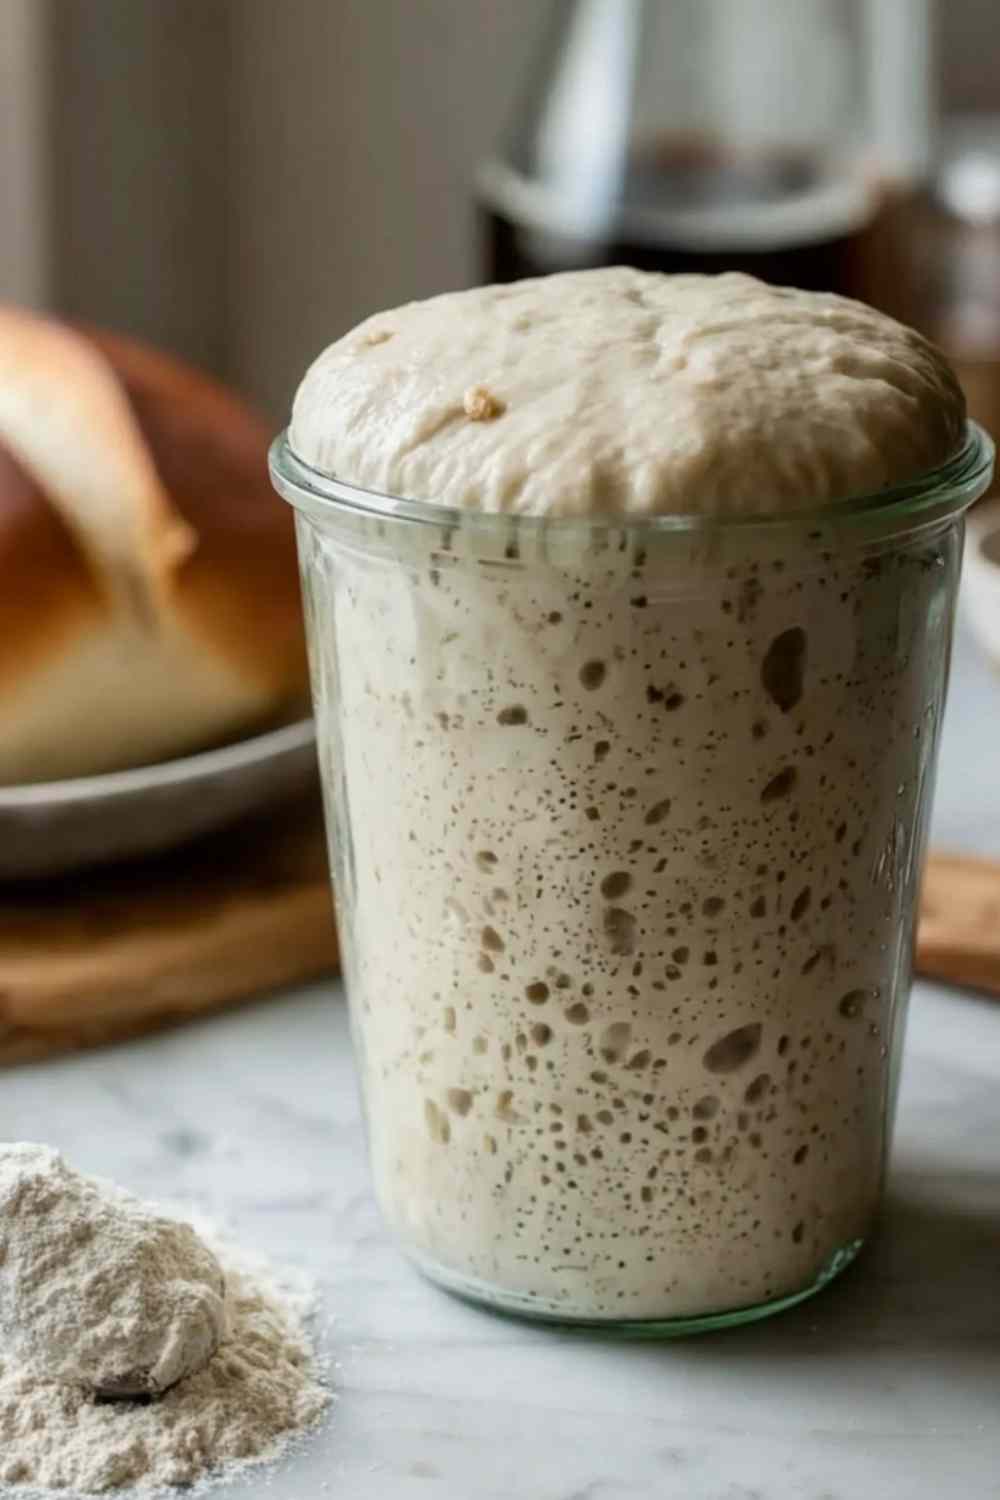
Step 3: Days 3-7 – Daily Feedings Repeat the same process each day at roughly the same time. Discard half the starter, then feed it with 1/2 cup (60g) all-purpose flour and 1/2 cup (120ml) warm water. By Day 3 or 4, you should start seeing more consistent bubbling, a noticeable rise in volume (sometimes doubling within 4-8 hours), and a pleasant sour, tangy aroma. If you see a grayish liquid on top (called hooch), your starter is hungry. You can stir it back in or pour it off before feeding. Your sourdough starter is ready to use when it consistently doubles in size within 4-8 hours after a feeding and passes the float test (a small spoonful floats in water).
Pro tip: If your starter isn’t very active by Day 7, don’t give up. Some starters take 10-14 days depending on your kitchen environment and the wild yeast in your area. Keep feeding it daily and watch for gradual improvement.
Common mistake to avoid: Using water that’s too hot (over 90°F) can kill the wild yeast. Always test the water temperature – it should feel lukewarm to the touch, like comfortable bath water.
Ways to Use Your Active Sourdough Starter
Once your sourdough starter is bubbling and active, the possibilities are delicious. This living ingredient adds complex flavor and natural leavening to countless recipes.
Classic Sourdough Bread: The most obvious pairing, your starter creates those beautiful open crumbs, chewy crust, and tangy flavor that make artisan sourdough bread so irresistible.
Sourdough Pancakes: Mix your discard (the portion you remove before feeding) with flour, eggs, and milk for fluffy, tangy pancakes with minimal waste.
Sourdough Waffles: Similar to pancakes but crispier, these work beautifully for weekend brunches and freeze well for quick weekday breakfasts.
Sourdough Pizza Dough: The long fermentation creates incredibly flavorful, digestible pizza crust with a perfect chewy-crispy texture.
Sourdough Crackers: Use your discard to make thin, crispy crackers seasoned with herbs, cheese, or seeds for a crunchy snack.
More Sourdough Recipes to Try
Once your sourdough starter is active and bubbling, you’ll want to explore all the delicious ways to use both the starter and the discard. The tangy flavor and natural fermentation benefits make sourdough an incredible addition to sweet and savory recipes alike. Try baking a loaf of Easy Sourdough Bagels for breakfast, or whip up some Sourdough Discard Pancakes for a fluffy weekend treat. For something more indulgent, the Classic Sourdough Discard Chocolate Chip Cookies are a must-try – they have the most incredible chewy texture and subtle tang that elevates traditional cookies to something truly special. If you’re feeling adventurous, the Sourdough Cinnamon Roll Focaccia combines two beloved recipes into one show-stopping breakfast treat that uses both your active starter and your baking creativity.
 6")
Keeping Your Sourdough Starter Fresh and Active
Proper storage makes the difference between a thriving starter and one that fizzles out. Once your starter is consistently doubling within 4-8 hours after feeding, you can keep it on the counter with daily feedings if you bake frequently. I recommend this method if you’re baking at least 2-3 times per week.
For less frequent baking, refrigerator storage is your best friend. Feed your sourdough starter as usual, let it sit at room temperature for 30 minutes, then transfer it to the fridge. It will go dormant and only needs feeding once a week. When you’re ready to bake, remove it from the fridge, let it come to room temperature (about 2-3 hours), then feed it 2-3 times over 24-48 hours to reactivate it fully.
Pro tip: I keep a small amount of backup starter dried on parchment paper (spread it thin and let it air dry completely) stored in an airtight container. If anything happens to my active starter, I can rehydrate the dried version and start fresh without going through the whole 7-14 day process again.
Common Questions About Making Sourdough Starter
Can I use all-purpose flour instead of whole wheat for Day 1?
Yes, but whole wheat or rye flour contains more wild yeast and natural enzymes that help jumpstart fermentation faster. If you only have all-purpose flour, your sourdough starter will still develop, it might just take a few extra days.
What if my starter smells like vinegar or alcohol?
This is normal and means your starter is hungry and producing acetic acid. The hooch (liquid) on top is alcohol from fermentation. Simply stir it back in or pour it off, then feed your starter. If the smell is extremely unpleasant or you see pink or orange streaks, discard it and start over.
How do I know when my sourdough starter is ready to bake with?
Your starter should consistently double in size within 4-8 hours after feeding, have lots of bubbles throughout, and pass the float test. Drop a small spoonful into a glass of water – if it floats, it’s ready.
Can I freeze my sourdough starter for long-term storage?
Yes, you can freeze starter in small portions for up to 6 months. Thaw it in the fridge, then feed it 2-3 times to reactivate before using.
Ready to Start Your Sourdough Journey?
Creating your own sourdough starter from scratch is easier than most people think and incredibly rewarding. With just flour, water, and a little daily attention, you’ll have a living ingredient that opens up a world of artisan baking possibilities. The process teaches patience and observation, and once you see that first successful double in your jar, you’ll understand why bakers get so passionate about their starters. Try this sourdough starter recipe this week and join the community of home bakers keeping this ancient tradition alive!
Sourdough Starter Recipe (Easy Homemade Guide for Beginners)
 7")
Learn how to make your own sourdough starter from scratch with this easy, beginner-friendly guide. Create a living, wild yeast levain for delicious homemade sourdough bread with just two simple ingredients.
- Prep Time: 5 minutes per day
- Cook Time: 0 minutes
- Total Time: 7-14 days
- Yield: 1 active sourdough starter (ongoing) 1x
- Category: Ingredient
- Method: Fermentation
- Cuisine: Universal
- Diet: Vegan
Ingredients
- 1/2 cup (60g) whole wheat or rye flour (for Day 1 kickstart)
- 1/2 cup (60g) all-purpose flour (for ongoing feedings)
- 1/2 cup (120ml) warm water, around 80°F/27°C
Instructions
- In your clean glass jar, combine 1/2 cup (60g) whole wheat or rye flour with 1/2 cup (120ml) of warm water. Stir thoroughly until no dry flour remains. Loosely cover and let sit in a warm spot (70-80°F) for 24 hours.
- Discard half of the starter (about 1/2 cup or 60g). Add 1/2 cup (60g) all-purpose flour and 1/2 cup (120ml) warm water to remaining starter. Stir well, cover loosely, and rest for 24 hours.
- Repeat daily at the same time: discard half the starter, feed with 1/2 cup (60g) all-purpose flour and 1/2 cup (120ml) warm water. Continue until starter consistently doubles in size within 4-8 hours after feeding.
- Your starter is ready when it doubles reliably, shows lots of bubbles throughout, has a pleasant sour smell, and passes the float test (small spoonful floats in water).
Notes
- Keep starter in a warm spot (70-80°F) for best results. Cold kitchens slow fermentation significantly.
- Use a kitchen scale for accurate 1:1:1 ratio by weight of starter:flour:water for consistent results.
- If you see hooch (grayish liquid on top), stir it back in or pour off before feeding. This means your starter is hungry.
- Building a mature starter takes 7-14 days depending on environment. Be patient and maintain daily feedings.
- If using heavily chlorinated tap water, let it sit out 24 hours or use filtered water.
- Store active starter in the fridge and feed weekly if not baking frequently. Reactivate with 2-3 feedings before using.
Nutrition
- Serving Size: 1/4 cup (60g) active starter
- Calories: 60 kcal
- Sugar: 0 g
- Sodium: 0 mg
- Fat: 0 g
- Saturated Fat: 0 g
- Unsaturated Fat: 0 g
- Trans Fat: 0 g
- Carbohydrates: 13 g
- Fiber: 0 g
- Protein: 2 g
- Cholesterol: 0 mg


