

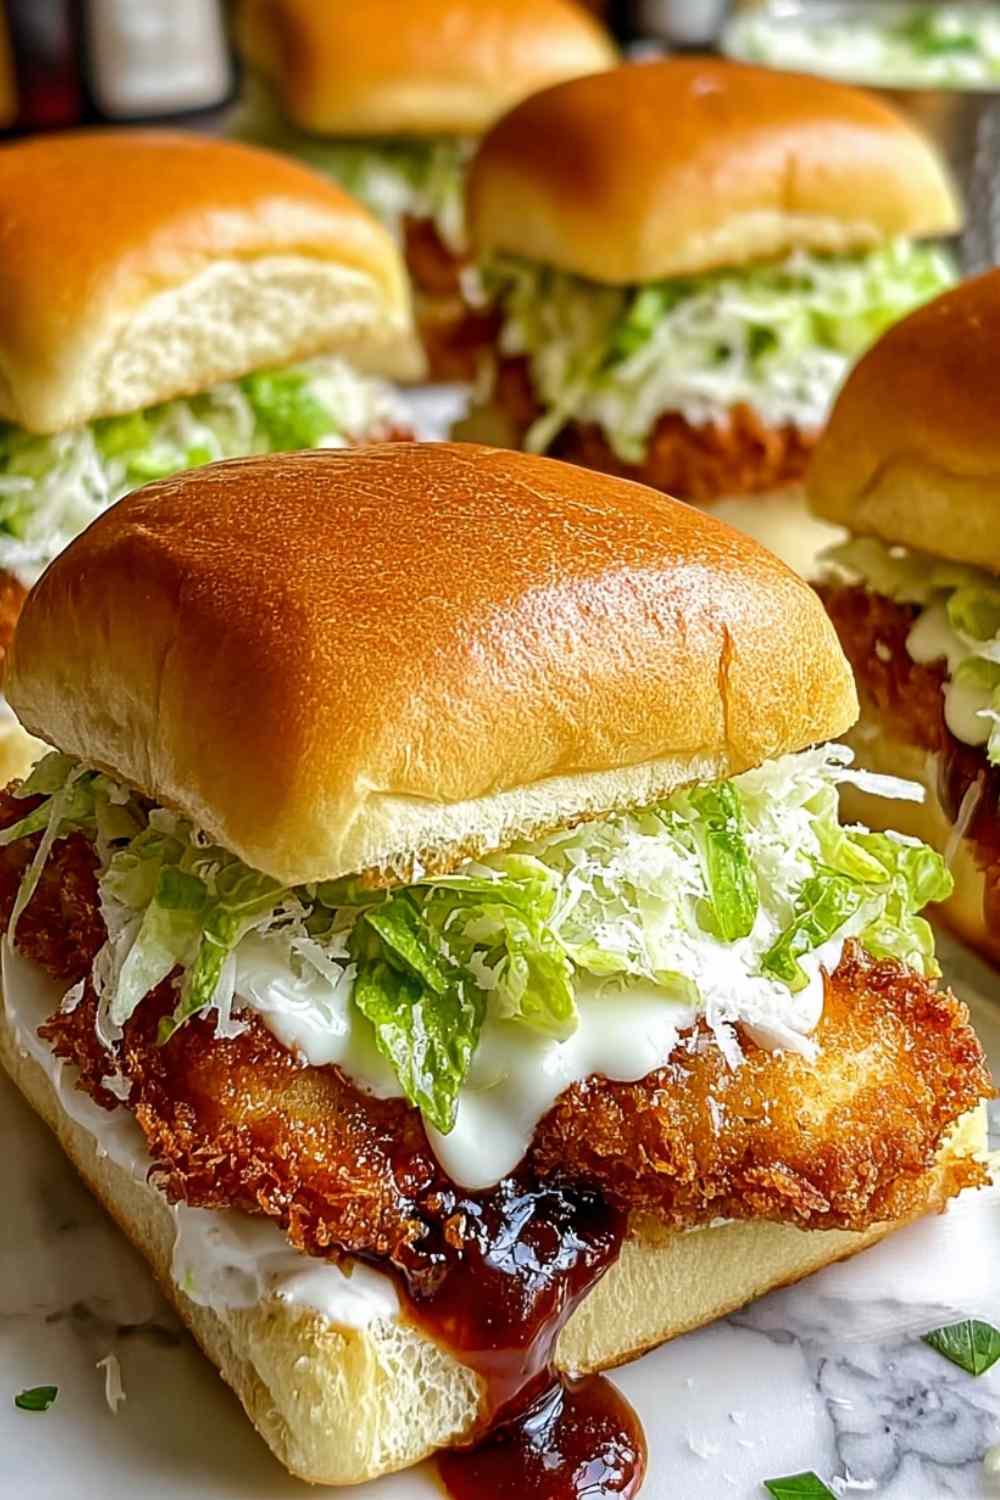
Crispy Chicken Caesar Sandwich is my go-to when I’m craving restaurant-quality lunch at home. The golden, panko-crusted chicken paired with cool, crisp Romaine and creamy Caesar dressing creates the perfect balance of textures and flavors in every bite.
I still remember the first time I made this sandwich on a lazy Sunday afternoon. The kitchen smelled amazing as the chicken fried to a perfect golden brown, and when I took that first crunchy bite, I knew this recipe was a keeper. This easy chicken sandwich recipe combines the classic Caesar salad flavors with satisfying fried chicken, making it perfect for weekday lunches or weekend gatherings. The best part? You can prep the breaded chicken ahead and freeze it, so crispy homemade sandwiches are always within reach.
Table of Contents
What You’ll Need for Your Crispy Chicken Caesar Sandwich
I always use panko breadcrumbs mixed with Parmesan for the crispiest coating you’ll ever taste. Pro tip: buttermilk is key for tender, juicy chicken, so don’t skip it!
Equipment needed: Large 12-inch skillet, meat mallet, three shallow dishes for breading, baking sheet, meat thermometer
- 4 boneless, skinless chicken breasts
- 1 cup all-purpose flour
- Salt (to taste)
- Black pepper (to taste)
- 1 teaspoon garlic powder
- 1 teaspoon onion powder
- 1 cup buttermilk (full-fat preferred for extra tenderness)
- 2 cups panko breadcrumbs
- 1/2 cup grated Parmesan cheese (freshly grated works best)
- 1/4 cup olive oil (for frying, plus more as needed for 1/2-inch depth)
- 4 large sandwich rolls (split) (ciabatta or brioche rolls work beautifully)
- 1 cup Romaine lettuce (shredded just before assembly)
- 1/2 cup Caesar dressing (homemade or quality store-bought)
- 1/4 cup shaved Parmesan cheese
- 2 tablespoons melted butter
- 1 garlic clove (minced)

How to Make the Best Crispy Chicken Caesar Sandwich
I recommend reading through all the steps before starting so you can work efficiently and get that perfect golden crust every time.
Step 1: Preheat your oven to 400°F (200°C). Line a baking sheet with parchment paper and set aside.
Step 2: Place chicken breasts between two sheets of plastic wrap. Using a meat mallet, pound them to an even 1/4 to 3/8-inch thickness. This thinner cut ensures they cook evenly and stay tender while achieving maximum crispiness.
Step 3: Set up your breading station with three shallow dishes. In the first, combine flour, salt, black pepper, garlic powder, and onion powder. Pour buttermilk into the second dish. In the third, mix panko breadcrumbs with grated Parmesan cheese until well combined.
Step 4: Working with one chicken breast at a time, dredge it in the seasoned flour mixture, shaking off any excess. Dip into the buttermilk, letting excess drip back into the bowl. Finally, press firmly into the panko-Parmesan mixture, ensuring complete coverage on all sides and edges. The key is pressing the breadcrumbs into the chicken so they really stick.
Step 5: Add olive oil to a large 12-inch skillet to reach 1/2-inch depth. Heat over medium-high heat until oil reaches 325-340°F (oil should shimmer but not smoke). Carefully place breaded chicken breasts in the hot oil, working in batches if needed to avoid overcrowding. Fry for approximately 4 minutes per side until deep golden brown and crispy. You’ll know it’s ready to flip when the edges turn golden. If coating starts to slide off, your oil may be too hot. Transfer fried chicken to the prepared baking sheet.
Step 6: Bake the chicken for 15 minutes or until the internal temperature reaches 165°F (74°C) when checked with a meat thermometer inserted into the thickest part. The chicken should feel firm to the touch, no longer pink when cut, and juices should run clear.
Step 7: While the chicken bakes, combine melted butter with minced garlic in a small bowl. Brush this mixture generously on the cut sides of your sandwich rolls. Place them cut-side up on a separate baking sheet.
Step 8: Toast the buttered rolls in the oven for about 5 minutes until golden brown and fragrant. Watch them carefully so they don’t burn. The garlic butter should be sizzling and aromatic.
Step 9: To assemble your Crispy Chicken Caesar Sandwich, place one piece of crispy chicken on the bottom half of each toasted roll.
Step 10: Top with a generous handful of freshly shredded Romaine lettuce, drizzle with Caesar dressing, and sprinkle shaved Parmesan cheese over everything. Close with the top half of the roll and serve immediately while the chicken is still hot and crunchy.
Perfect Pairings for Your Chicken Caesar Sandwich
These sides complement the rich, savory flavors of the sandwich beautifully.
Sweet Potato Fries: The natural sweetness balances the tangy Caesar dressing while adding extra nutrition and a satisfying crunch.
Crisp Green Salad with Lemon Vinaigrette: A light, refreshing side that keeps the meal from feeling too heavy, plus the citrus brightens every bite.
Fresh Lemon Wedge: Squeeze it over the chicken right before eating for a bright, zesty kick that cuts through the richness.
Homemade Coleslaw: The cool, crunchy slaw adds textural contrast and a refreshing element that makes this the best chicken sandwich recipe for summer gatherings.
More Delicious Chicken Recipes to Try
This Crispy Chicken Caesar Sandwich pairs perfectly with other crowd-pleasing chicken dishes that bring variety to your meal planning. For another crispy favorite, try the Crispy Parmesan Chicken with Rich Garlic Sauce, which shares the same satisfying crunch with an Italian twist. When you’re craving more Caesar flavor profiles, the Best Parmesan Crusted Chicken with Creamy Garlic Sauce delivers that same golden coating with a luscious sauce.
For lighter options that still pack incredible flavor, check out the Sheet Pan Chicken Pitas with Herby Ranch or the refreshing Maple Dijon Chicken Roasted Sweet Potato Bowls. These recipes complement the sandwich beautifully when you want to offer variety at gatherings or simply rotate through different chicken preparations during the week.

Keeping Your Crispy Chicken Sandwich Fresh
Store components separately to maintain that perfect crunch. Keep the cooked chicken breasts in an airtight container in the refrigerator for up to 2 days. Store lettuce and toasted rolls separately to prevent sogginess.
For longer storage, wrap each fully cooled, breaded chicken breast individually in plastic wrap, then place in a freezer-safe bag. They’ll stay fresh for up to 3 months. When ready to eat, there’s no need to thaw.
To reheat and restore crispiness, place frozen or refrigerated chicken on a wire rack set over a baking sheet. Bake at 350°F (175°C) for 8-10 minutes if refrigerated, or 15-18 minutes if frozen. The wire rack allows hot air to circulate, keeping the bottom crispy. Pro tip: avoid microwaving, as it makes the breading soggy.
Your Crispy Chicken Caesar Sandwich Questions Answered
Can I use regular breadcrumbs instead of panko?
Yes, but panko creates a lighter, crunchier coating. If using regular breadcrumbs, your Crispy Chicken Caesar Sandwich will still be delicious but slightly less crispy.
What if my chicken is dry?
This usually means it was overcooked. Always use a meat thermometer and remove the chicken at exactly 165°F. The buttermilk soak also helps keep it moist, so don’t skip that step.
Can I make this recipe dairy-free?
Substitute the buttermilk with dairy-free milk mixed with 1 tablespoon lemon juice. Use nutritional yeast instead of Parmesan in the coating, and choose a dairy-free Caesar dressing.
Time to Make This Sandwich Magic Happen
Making a homemade Crispy Chicken Caesar Sandwich is easier than you think, and the results are so rewarding. The combination of crunchy, golden chicken with cool lettuce and tangy dressing creates a sandwich that rivals any restaurant version. Whether you’re meal prepping for the week or treating yourself to a special lunch, this recipe delivers every single time. Try this recipe tonight and discover your new favorite sandwich!
Crispy Chicken Caesar Sandwich

Golden panko-crusted chicken with crisp Romaine lettuce and tangy Caesar dressing on toasted rolls. Perfect lunch recipe ready in under an hour.
- Prep Time: 30 minutes
- Cook Time: 25 minutes
- Total Time: 55 minutes
- Yield: 4 sandwiches 1x
- Category: Chicken Breast
- Method: Fry, Bake
- Cuisine: American
Ingredients
- 4 boneless, skinless chicken breasts
- 1 cup all-purpose flour
- Salt (to taste)
- Black pepper (to taste)
- 1 teaspoon garlic powder
- 1 teaspoon onion powder
- 1 cup buttermilk
- 2 cups panko breadcrumbs
- 1/2 cup grated Parmesan cheese
- 1/4 cup olive oil (for frying, plus more as needed)
- 4 large sandwich rolls (split)
- 1 cup Romaine lettuce (shredded)
- 1/2 cup Caesar dressing
- 1/4 cup shaved Parmesan cheese
- 2 tablespoons melted butter
- 1 garlic clove (minced)
Instructions
- Preheat oven to 400°F (200°C) and line a baking sheet with parchment paper.
- Pound chicken breasts to an even 1/4 to 3/8-inch thickness using a meat mallet between plastic wrap.
- Set up three shallow dishes: combine flour, salt, pepper, garlic powder, and onion powder in first dish; pour buttermilk in second; mix panko and Parmesan in third.
- Dredge each chicken breast in flour mixture, dip in buttermilk, then press firmly into panko-Parmesan mixture to coat completely on all sides.
- Add oil to large skillet to 1/2-inch depth. Heat over medium-high heat to 325-340°F. Fry breaded chicken for 4 minutes per side until deep golden brown and crispy. Transfer to prepared baking sheet.
- Bake chicken for 15 minutes until internal temperature reaches 165°F (74°C) and chicken is no longer pink inside.
- Mix melted butter with minced garlic. Brush mixture on cut sides of sandwich rolls and place on separate baking sheet.
- Toast buttered rolls in oven for 5 minutes until golden brown and fragrant.
- Place crispy chicken on bottom half of each toasted roll. Top with freshly shredded Romaine lettuce.
- Drizzle Caesar dressing over lettuce, sprinkle with shaved Parmesan, and close with top half of roll. Serve immediately.
Notes
- Pounding chicken to 1/4 to 3/8-inch thickness ensures even cooking and maximum crispiness. Use a meat mallet and work gently.
- Press panko coating firmly onto chicken so it adheres well during frying. Wet hands slightly if mixture sticks to fingers.
- Maintain oil temperature at 325-340°F. If coating slides off, oil may be too hot.
- Freeze breaded uncooked chicken for up to 3 months. Fry from frozen, adding 2-3 extra minutes per side.
- For extra kick, add 1/4 teaspoon cayenne pepper to flour mixture.
- Ciabatta or brioche rolls work beautifully for this sandwich.
Nutrition
- Serving Size: 1 sandwich
- Calories: 650 kcal
- Sugar: 6 g
- Sodium: 890 mg
- Fat: 32 g
- Saturated Fat: 9 g
- Unsaturated Fat: 21 g
- Trans Fat: 0 g
- Carbohydrates: 52 g
- Fiber: 3 g
- Protein: 42 g
- Cholesterol: 135 mg


