

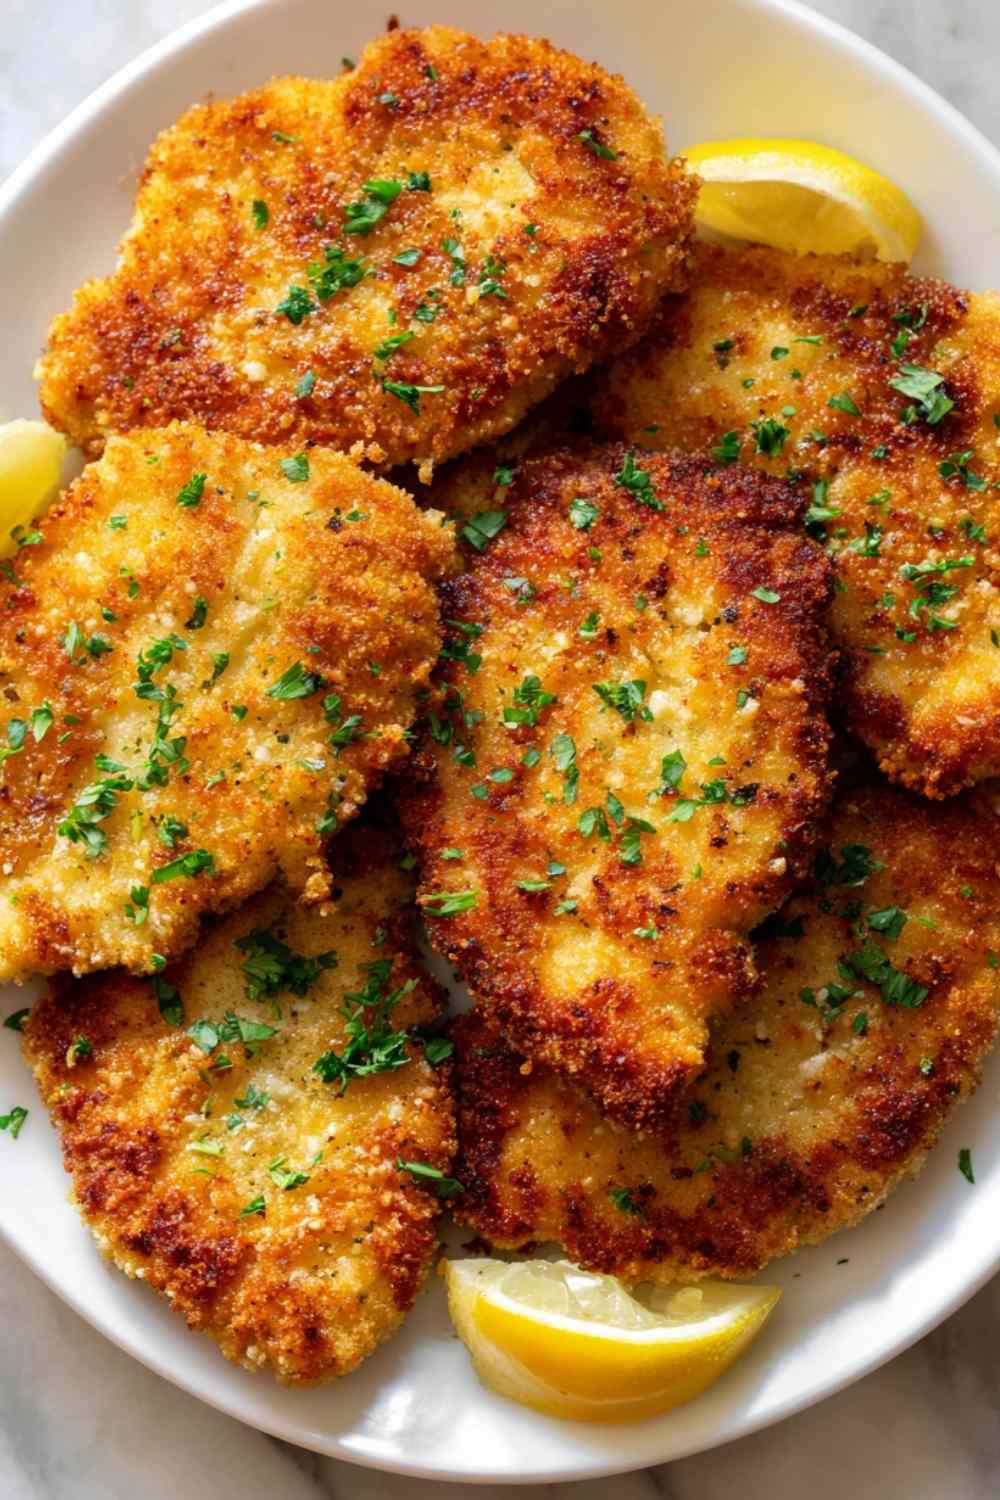
Chicken cutlets are my go-to weeknight dinner when I need something crispy, satisfying, and fast on the table. These thinly sliced, golden-brown pieces come together quickly and never fail to impress even on the most hectic evenings.
I still remember the first time I made homemade chicken cutlets from scratch. I had a couple of chicken breasts in the fridge, no plan, and about 30 minutes before dinner had to be on the table. Once I learned the simple horizontal slicing technique, everything changed. Now this breaded chicken cutlet recipe is on regular rotation in my kitchen. It is comforting, crunchy, and easy enough for any night of the week. The Panko coating crisps up beautifully and the whole family always comes back for seconds.
Table of Contents
What You Need to Make These Chicken Cutlets
I always keep these ingredients simple and pantry-friendly. The key to a great breaded chicken cutlet is building layers of flavor at every stage. Pro tip: Panko breadcrumbs give you a far crispier coating than regular breadcrumbs, so I never substitute them out.
- 2 boneless, skinless chicken breasts
- 1/4 cup all-purpose flour
- 2 large eggs, beaten
- 1 cup Panko breadcrumbs (always choose Panko over regular for a crunchier finish)
- 2 teaspoons Italian seasoning
- Kosher salt, to taste
- Ground black pepper, to taste
- Cooking oil for frying – vegetable or canola oil works best for a neutral flavor and high smoke point

Step-by-Step Guide to Crispy Breaded Chicken Cutlets
I recommend reading through all the steps before starting. Having your dredging station set up ahead of time makes this whole process smooth and stress-free. Here is how I make them every time.
Step 1: Place one chicken breast flat on a cutting board with the thicker side facing away from you. Press your hand firmly on top to hold it steady.
Step 2: Position your knife horizontally at the midpoint of the thicker side, keeping the blade parallel to the board. Curve your fingers upward to protect your hand.
Step 3: Slice lengthwise through the breast, angling the knife slightly downward as you move toward the thinner end. Cut all the way through to create two even pieces. Repeat with the second breast.
Step 4: Place each cutlet between two sheets of plastic wrap and pound with a meat mallet until even at about 1/4 to 1/2 inch thick. No mallet? A heavy skillet or rolling pin works just as well.
Step 5: Set up your dredging station with three shallow bowls. Bowl one holds the flour, bowl two holds beaten eggs, and bowl three holds Panko breadcrumbs mixed with Italian seasoning, salt, and pepper.
Step 6: Coat each chicken cutlet in flour on both sides, shaking off any excess. Dip into the egg, letting the extra drip off, then press firmly into the breadcrumb mixture on both sides. Set aside and repeat with all cutlets.
Step 7: Pour about 1/2 inch of oil into a large skillet over medium-high heat. Heat the oil to between 350 and 375 degrees F. To check without a thermometer, drop a small breadcrumb into the oil – it should sizzle immediately and float to the surface. If the oil smokes heavily, it is too hot.
Step 8: Place chicken cutlets in the hot oil without crowding the pan. Fry in batches for 3 to 4 minutes per side until deep golden brown. The crust should look like a toasted cracker color, not pale yellow.
Step 9: Transfer finished cutlets to a wire rack or paper towel-lined plate. Do not stack them or the steam will soften the coating. Serve hot.
Air Fryer Option: Preheat your air fryer to 350 degrees F for 4 to 5 minutes. Bread the cutlets as instructed above. Cook for 10 minutes total, flipping once at the halfway mark. The coating will be slightly less deeply golden but still satisfyingly crispy.
Best Sides to Serve with Your Chicken Cutlets
These chicken cutlets pair beautifully with almost anything, but a few combinations are especially satisfying. Here are the best sides for chicken cutlets that round out the meal without much extra effort.
Pasta: Simple spaghetti with marinara or aglio e olio turns this into a chicken cutlet dinner that feels like something from a restaurant. The saucy pasta soaks up any pan drippings beautifully.
Mashed Potatoes: Creamy, buttery mashed potatoes balance the crunch of the breaded coating perfectly. The contrast in texture is what makes this pairing such a classic comfort food combination.
Roasted or Steamed Vegetables: Broccoli, green beans, or zucchini add color and freshness to the plate. Roasting vegetables brings out natural sweetness that works especially well against savory, golden chicken cutlets.
Your Favorite Dipping Sauce: Ranch, honey mustard, or marinara all work great. Sauces make this dinner feel fun and casual, which kids especially love.
More Chicken Dinner Recipes to Try Next
These crispy chicken cutlets are a great base for so many meals throughout the week. If this recipe hit the spot, the Pan Seared Chicken Breast and Juicy Garlic Butter Baked Chicken Breast use similar simple techniques and are just as satisfying on a busy night. For something with a little more flavor punch, the Crispy Dill Pickle Parmesan Chicken brings a tangy twist to the same crispy coating concept.
Chicken cutlets also pair perfectly as a protein alongside dishes like Lemon Chicken Pasta or Garlic Butter Chicken Pasta when sliced and served on top. For a lighter option, try serving leftover cutlets over the Chicken Caesar Salad for a satisfying next-day lunch that comes together in minutes.

How to Store and Reheat Chicken Cutlets
Storing your chicken cutlets the right way means great leftovers. Raw, uncooked cutlets can be refrigerated for 1 to 2 days or frozen for up to one year. Cooked cutlets keep well in an airtight container in the refrigerator for 3 to 4 days or in the freezer for 2 to 4 months.
For reheating, I recommend an oven or air fryer over a microwave every single time. A microwave makes the coating soft and soggy in minutes. Reheat in a 375-degree oven for about 10 minutes or pop them in the air fryer for 5 to 6 minutes to bring the crispy coating back to life.
Pro tip: Leftover chicken cutlets are incredible in sandwiches, sliced over a simple green salad, or tucked into wraps with fresh vegetables for a completely different meal the next day.
Chicken Cutlet Questions Answered
Can I use store-bought cutlets instead of slicing my own?
Yes, absolutely. If your grocery store carries pre-sliced chicken cutlets, skip straight to the breading and frying steps. The recipe works exactly the same either way.
Why is my breading falling off while frying?
Two things usually cause this. First, the oil was not hot enough when the cutlets went in. Always heat the oil to at least 350 degrees F before adding chicken. Second, the breadcrumb layer was not pressed firmly enough onto the surface. After dipping in egg, use your palm to firmly press the crumbs onto both sides before frying.
Can I freeze breaded chicken cutlets before cooking?
Yes. After breading, lay cutlets in a single layer on a baking sheet and freeze until solid, then transfer to a freezer bag. You can fry them directly from frozen by adding 2 to 3 extra minutes per side and making sure the internal temperature reaches 165 degrees F.
Make These Crispy Chicken Cutlets Tonight
Homemade chicken cutlets are easier to make than most people expect, and the results are completely worth the effort. With a simple slicing technique and a golden Panko coating, dinner comes together in under 30 minutes and tastes like something you would pay for at a restaurant. Whether you fry them in a skillet or use the air fryer option, this breaded chicken cutlet recipe is one that earns a permanent spot in your weeknight rotation. Give it a try tonight and see just how satisfying a simple dinner can be.
How to Make Chicken Cutlets

Learn how to slice chicken breasts into thin even cutlets and coat them in a crispy Panko breadcrumb crust. This easy chicken cutlets recipe is ready in 25 minutes and includes a skillet and air fryer option.
- Prep Time: 15 minutes
- Cook Time: 10 minutes
- Total Time: 25 minutes
- Yield: 4 servings 1x
- Category: Dinner
- Method: Fry
- Cuisine: American
Ingredients
- 2 boneless, skinless chicken breasts
- 1/4 cup all-purpose flour
- 2 large eggs, beaten
- 1 cup Panko breadcrumbs
- 2 teaspoons Italian seasoning
- Kosher salt, to taste
- Ground black pepper, to taste
- Cooking oil for frying (vegetable or canola oil recommended)
Instructions
- Place one chicken breast flat on a cutting board with the thicker side facing away from you. Hold firmly and position your knife horizontally at the midpoint of the thicker side, parallel to the board.
- Slice lengthwise through the breast, angling the knife slightly downward toward the thinner end. Cut all the way through to create two even cutlets. Repeat with the second breast.
- Place each cutlet between two sheets of plastic wrap and pound with a meat mallet until even at about 1/4 to 1/2 inch thick.
- Set up three shallow bowls: flour in bowl one, beaten eggs in bowl two, and Panko breadcrumbs mixed with Italian seasoning, salt, and pepper in bowl three.
- Coat each cutlet in flour on both sides, shaking off any excess. Dip into egg, letting extra drip off, then press firmly into the breadcrumb mixture on both sides. Repeat for all cutlets.
- Add about 1/2 inch of cooking oil to a large skillet over medium-high heat. Heat oil to between 350 and 375 degrees F. Drop a small breadcrumb into the oil to test – it should sizzle immediately.
- Place cutlets in the hot oil without crowding the pan. Fry in batches for 3 to 4 minutes per side until deep golden brown and cooked through to 165 degrees F.
- Transfer to a wire rack or paper towel-lined plate. Do not stack. Serve hot with your favorite sides.
Notes
- Air Fryer Option: Preheat air fryer to 350 degrees F for 4 to 5 minutes. Bread cutlets as instructed. Cook for 10 minutes total, flipping once halfway through.
- Use vegetable or canola oil for a neutral flavor and high smoke point when frying.
- Do not overcrowd the pan or the oil temperature will drop and the coating will absorb oil instead of crisping.
- Reheat leftovers in a 375 degree oven or air fryer to restore the crispy coating. Avoid microwave reheating.
- Leftover cutlets are great in sandwiches, wraps, or sliced over salads.
Nutrition
- Serving Size: 1 cutlet
- Calories: 307 kcal
- Sugar: 1 g
- Sodium: 207 mg
- Fat: 18 g
- Saturated Fat: 3 g
- Unsaturated Fat: 15 g
- Trans Fat: 0 g
- Carbohydrates: 18 g
- Fiber: 1 g
- Protein: 18 g
- Cholesterol: 118 mg


