

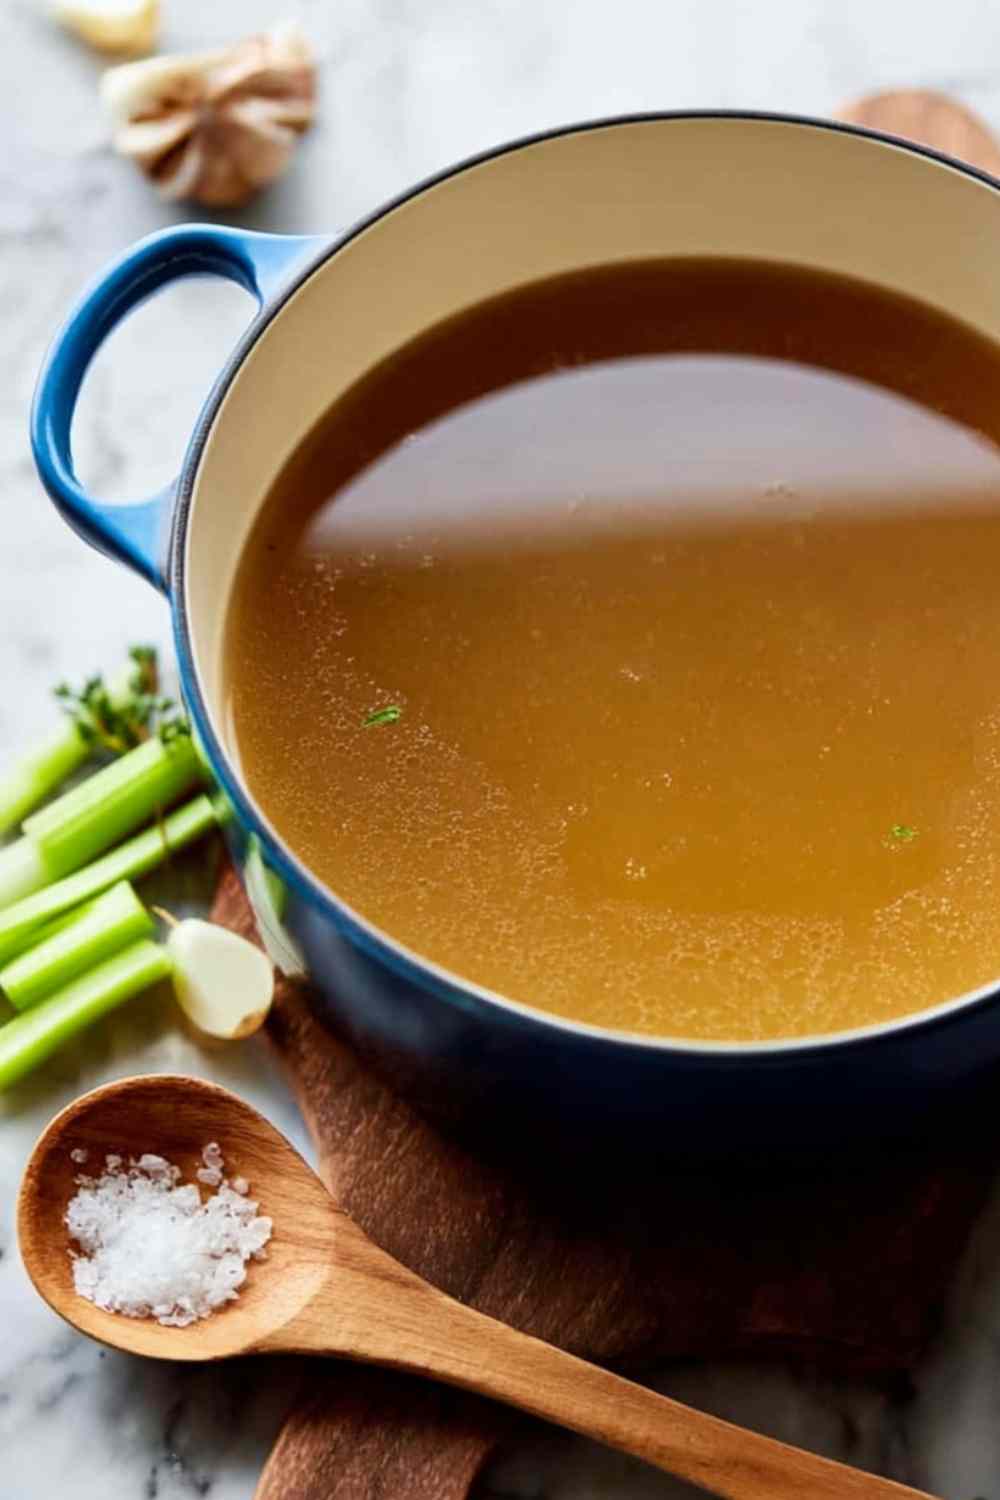
Homemade chicken broth from scratch is one of those recipes that completely transforms your cooking once you try it. This version uses two whole chickens, a handful of aromatics, and two secret ingredients – soy sauce and whole cloves – to produce a broth so golden and deeply savory that store-bought versions simply cannot compete.
I made my first big batch of homemade chicken broth on a rainy Sunday when I had two chickens in the fridge and no plan for dinner. The smell that filled my kitchen after just an hour of simmering – rich, savory, and deeply warming – told me everything I needed to know. What makes this homemade chicken broth so practical for everyday cooking is that one single pot gives you 19 cups of flavorful golden broth AND 4 cups of tender cooked chicken meat you can use all week. It is zero-waste, naturally lower in sodium than most store-bought options, and the kind of nourishing staple that makes every recipe it touches taste more complete.
Table of Contents
Everything You Need for This Homemade Chicken Broth
I always use whole young roasting chickens for this recipe because the bones and joints release the most collagen during the long simmer. Do not peel your onions or carrots – those skins add a beautiful golden color and earthy depth that you just cannot replicate otherwise. Pro tip: keep a freezer bag of vegetable scraps (onion ends, celery tops, carrot peels) and toss them in for an even richer batch next time.
- 2 (5-pound) whole young roasting chickens
- 3 large yellow onions – unpeeled and quartered
- 1 head garlic – unpeeled and halved (optional but recommended)
- 6 large carrots – washed, unpeeled, and quartered
- 4 ribs celery with leaves – washed and halved
- 2 tablespoons herbes de Provence
- 4 dried bay leaves
- 12 whole cloves (the secret ingredient for subtle warmth)
- 2 teaspoons whole black peppercorns
- 1 tablespoon kosher salt
- 1 tablespoon low-sodium soy sauce (the umami secret weapon)
- 6 quarts cold water
I prefer Diamond Crystal kosher salt here because it gives you more control over seasoning as the broth concentrates. If you only have Morton’s, start with a little less since it runs saltier.

Step-by-Step Instructions for Rich, Golden Homemade Chicken Broth
I recommend reading through all the steps once before you start. The most important move in this whole recipe is pulling the chicken meat out at the right time – leave it in too long and it dries out while the bones keep on giving.
Step 1: Add both whole chickens, quartered onions, halved garlic, carrots, celery, herbes de Provence, bay leaves, cloves, peppercorns, salt, and soy sauce into a 16-20 quart stockpot. Pour in 6 quarts of cold water. If your chickens do not fit whole, break them into pieces. Note that parting them out may shorten your first cook time, so check the internal temperature of the meat around the 2-hour mark.
Step 2: Bring the pot to a full boil over high heat, then immediately reduce to a low, steady simmer. Cook uncovered for 2.5 hours, or until the chicken reaches an internal temperature of 165 degrees F at the thickest part of the thigh. You will see a gentle, steady bubble around the edges – that is exactly where you want it.
Step 3: Carefully lift the cooked chickens out and transfer them to two large bowls. Pull the chicken apart by hand while it is still warm – separate the wings, legs, thighs, and body. Remove all white meat from the bones in the largest pieces possible. The meat near the wing joints and close to the wishbone is easy to miss, so take your time here.
Step 4: Return all the bones and any juices that collected in the bowls back into the stockpot. Taste the broth now – it should taste lightly, pleasantly salted at this stage. Remember it will reduce and concentrate over the next 1.5 hours, so season very gently if at all.
Step 5: Continue simmering the broth uncovered for another 1.5 hours. While it reduces, cut or shred the reserved chicken meat and store it in an airtight container in the fridge for the week or in the freezer for up to 3 months.
Step 6: After the full cook time, strain the broth through a colander, discarding all solids. For a cleaner, silkier finish, run the strained broth through a fine mesh sieve as well. The softened vegetables can be pureed and stirred into sauces or soups to add body – do not toss them.
Step 7: Refrigerate the strained broth overnight. The next day, use a ladle or large spoon to remove the solid white fat layer that has formed on the surface. Save that fat in a small jar – it is incredible for sauteing vegetables and adds a rich savory note that regular oil cannot match.
Step 8: If your chilled broth looks like thick gelatin – that is a great sign. It means your homemade chicken broth pulled plenty of collagen from the bones during those long, slow hours of simmering. It will return to a fully liquid, pourable consistency as soon as you reheat it.
Best Ways to Serve and Use Your Homemade Chicken Broth
This broth pairs well with nearly any recipe that calls for a savory, full-flavored liquid base. Here are the best ways to put homemade chicken broth to work in your kitchen:
Chicken noodle soup: The classic choice – this broth has the depth and body to carry a simple soup from good to genuinely memorable.
Cooking rice or quinoa: Swap water for broth to add savory flavor to every grain with zero extra effort.
Pan sauces and gravies: A splash deglazes a pan and builds a rich, restaurant-quality sauce in minutes.
Risotto or creamy pasta dishes: The collagen in this broth creates a silky, luxurious texture in creamy dishes.
Braised vegetables: Use broth instead of water when braising greens, carrots, or potatoes for a deeply flavored side dish.
Chicken paprikash or Tuscan chicken: This homemade chicken broth is the ideal base for any comfort food recipe that needs body and flavor.
More Recipes to Make the Most of Your Homemade Chicken Broth
This rich homemade chicken broth is the perfect base for so many comforting meals throughout the week. Pour it straight into a cozy pot of Sicilian Chicken Soup or use it to build the deeply savory base in a big pot of Italian Vegetable Soup for a nourishing weeknight dinner.
The cooked chicken you pull from this broth works beautifully in so many recipes too. Shred it straight into a warming bowl of Easy Chicken Enchilada Soup, stir it into a creamy pot of Creamy Crack Chicken Noodle Soup, tuck it into Garlic and Sage Chicken Soup, or use it to build a quick and satisfying Easy Ginger Garlic Chicken Noodle Soup that comes together in minutes.

How to Store Homemade Chicken Broth the Right Way
This broth stores beautifully in both the fridge and the freezer. Refrigerate in airtight containers for up to 3 days. For longer storage, freeze in 1-2 cup portions in freezer-safe bags or containers for up to 3 months – portioning it ahead of time means you can grab exactly what you need for weeknight recipes without thawing a full batch.
To reheat, pour the amount you need into a small saucepan over medium heat and warm until fully liquefied. If your broth is gelatinous straight from the fridge, that is completely normal – it will return to liquid within a few minutes. Store the cooked chicken meat separately in the fridge for 3-4 days, or freeze it for up to 3 months.
I recommend storing the skimmed chicken fat in a small airtight jar in the fridge for up to 2 weeks. Use it like butter or oil when sauteing onions, garlic, or vegetables. It adds a rich, savory depth to dishes that is hard to describe but impossible to miss once you try it.
Frequently Asked Questions About Homemade Chicken Broth
Can I make this homemade chicken broth in a slow cooker or Instant Pot?
Yes. For a slow cooker, add all ingredients and cook on low for 10-12 hours. For an Instant Pot, pressure cook on high for 2-3 hours. The stovetop method delivers the most control and the most concentrated flavor, but both work well for everyday use.
Why does my homemade chicken broth turn into gelatin after chilling?
That thick, jelly-like texture after chilling is actually the best sign you can get. It means the long simmer pulled plenty of collagen from the chicken bones, producing a richly nutritious broth. It will return to a perfectly pourable liquid as soon as you reheat it on the stovetop.
Can I reduce the sodium in this recipe?
Absolutely. Simply use less kosher salt and/or soy sauce to taste. This broth is already significantly lower in sodium than most store-bought options. If a recipe calls for low-sodium broth, reduce the added salt here and it works as a direct substitute.
Make a Batch and Taste the Difference
Once you make homemade chicken broth from scratch, reaching for a store-bought carton just feels wrong. The depth of flavor, the golden color, the way it makes every recipe taste more complete – it is one of the most satisfying kitchen projects a home cook can take on. Plus, walking away with nearly 20 cups of broth AND a full container of cooked chicken is genuinely hard to beat. Try this recipe this weekend and see for yourself.
Homemade Chicken Broth

Rich, deeply flavorful homemade chicken broth made with two whole chickens, aromatic vegetables, herbes de Provence, and two secret ingredients – soy sauce for umami and whole cloves for warmth. One batch yields 19 cups of broth plus 4 cups of cooked chicken meat.
- Prep Time: 20 minutes
- Cook Time: 4 hours
- Total Time: 4 hours 20 minutes
- Yield: 19 cups broth plus 4 cups cooked chicken 1x
- Category: Soup, Broth, Stock
- Method: Simmer, Stovetop
- Cuisine: American
Ingredients
- 2 (5-pound) whole young roasting chickens
- 3 large yellow onions, unpeeled and quartered
- 1 head garlic, unpeeled and halved (optional)
- 6 large carrots, washed, unpeeled, and quartered
- 4 ribs celery with leaves, washed and halved
- 2 tablespoons herbes de Provence
- 4 dried bay leaves
- 12 whole cloves
- 2 teaspoons whole black peppercorns
- 1 tablespoon kosher salt
- 1 tablespoon low-sodium soy sauce
- 6 quarts cold water
Instructions
- Place both whole chickens, quartered onions, halved garlic, quartered carrots, halved celery, herbes de Provence, bay leaves, cloves, peppercorns, salt, and soy sauce into a 16-20 quart stockpot. Cover with 6 quarts of cold water. If chickens do not fit whole, part them out and begin checking internal temperature around the 2-hour mark.
- Bring to a full boil over high heat, then immediately reduce to a low steady simmer. Cook uncovered for 2.5 hours, or until chicken reaches an internal temperature of 165 degrees F at the thickest part of the thigh.
- Carefully transfer cooked chickens to two large bowls. Pull chicken apart by hand while still warm. Remove all white meat from the bones in large pieces. Do not miss the meat near the wing joints and wishbone.
- Return all bones and accumulated juices back into the stockpot. Taste the broth and season lightly if needed. It will reduce and concentrate further during the next simmer.
- Continue simmering the broth uncovered for another 1.5 hours. While it reduces, cut or shred the reserved chicken meat and store separately in the fridge or freezer.
- Strain broth through a colander, discarding all solids. For a clearer, silkier result, run through a fine mesh sieve as well. Softened vegetables can be pureed to thicken sauces or soups.
- Refrigerate strained broth overnight. The next day, remove the solid fat layer from the surface using a ladle or spoon. Save the fat in a small jar in the fridge for up to 2 weeks and use it for sauteing.
- If chilled broth looks gelatinous, that is a sign of a collagen-rich broth. It will return to a fully liquid consistency once reheated on the stovetop.
Notes
- Leave onion and carrot skins on – they add golden color and earthy depth to the finished broth.
- Remove chicken meat at the 2.5-hour mark to keep it tender. The bones continue contributing collagen and flavor to the broth during the second simmer.
- The longer you simmer up to 8 hours, the more concentrated and gelatinous your broth will become.
- Save skimmed chicken fat in a small jar in the fridge for up to 2 weeks and use it like butter for sauteing vegetables or aromatics.
- Portion frozen broth into 1-2 cup amounts for easy use in weeknight recipes without thawing a full batch.
Nutrition
- Serving Size: 1 cup broth
- Calories: 102 kcal
- Sugar: 2 g
- Sodium: 437 mg
- Fat: 9 g
- Saturated Fat: 3 g
- Unsaturated Fat: 6 g
- Trans Fat: 0 g
- Carbohydrates: 6 g
- Fiber: 2 g
- Protein: 1 g
- Cholesterol: 7 mg


