

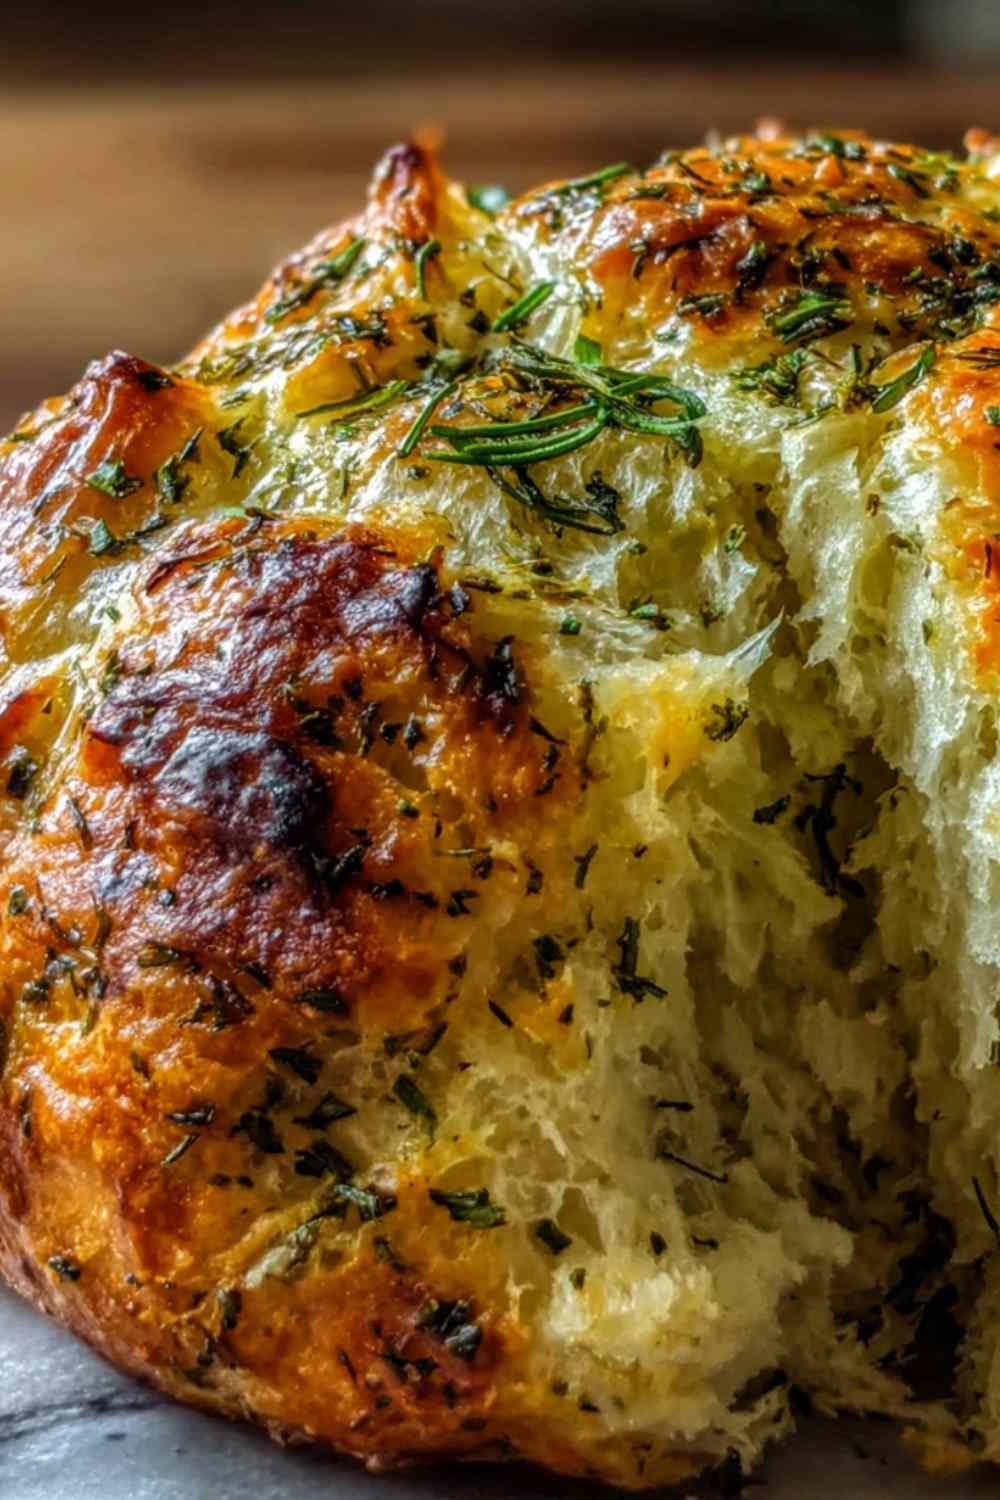
Garlic herb Dutch oven bread is one of those recipes that makes you look like a professional baker with almost zero effort. The first time I pulled a golden, crackling loaf out of my Dutch oven, I couldn’t believe something so impressive came from just a few pantry staples and my own two hands.
I’ll be honest – I avoided bread baking for years because I thought it required fancy equipment and expert kneading skills. Then a friend showed me this no-knead method, and everything changed. Now I make this garlic herb bread at least twice a month, especially when I want my kitchen to smell amazing or need something special to serve with soup. The crackling crust gives way to the softest, most pillowy interior, and those pockets of roasted garlic and fresh herbs make every bite feel like a warm hug. This easy Dutch oven bread has become my go-to recipe for impressing dinner guests without breaking a sweat.
Table of Contents
What You’ll Need for This Crusty Garlic Bread
I always use bread flour when I can find it for an extra chewy texture, but all-purpose flour works beautifully too. The key is measuring accurately and not skipping the Parmesan – it adds a subtle savory depth that makes this garlic herb Dutch oven bread truly special.
- 3 ¼ cups (400g) all-purpose flour
- 2 ¼ tsp (7g) active dry yeast
- 1 ½ tsp salt
- 1 tbsp sugar
- 1 ½ cups (360ml) warm water (110-115°F)
- 3 cloves garlic, minced
- 1 tbsp fresh chopped herbs (like rosemary, thyme, or parsley)
- ½ cup (50g) grated Parmesan cheese
- 2 tbsp unsalted butter, melted
Equipment needed: Large mixing bowl, 4-6 quart Dutch oven with lid, parchment paper
Pro tip: I prefer using a combination of rosemary and thyme for the most aromatic result, but feel free to use whatever fresh herbs you have on hand. Dried herbs work in a pinch – just use 1 teaspoon total since they’re more concentrated.

How to Make Perfect Dutch Oven Bread
I recommend having everything measured and ready before you start – this recipe comes together quickly once you begin. The beauty of this no-knead method is that time does most of the work for you.
Step 1: In a large bowl, whisk together the flour, yeast, salt, and sugar until evenly combined. This ensures the yeast distributes throughout the dough.
Step 2: Add the warm water (it should feel like a comfortable bath – not hot, and you should be able to hold your finger in it comfortably), minced garlic, chopped herbs, and Parmesan cheese. Stir with a wooden spoon or spatula until a shaggy, sticky dough forms. Make sure all the flour is incorporated, even if it looks messy. This should take about 2 minutes of stirring.
Step 3: Cover the bowl with plastic wrap or a clean kitchen towel and let it rise in a warm place for 1.5 to 2 hours, or until the dough has doubled in size. I like to place mine near a sunny window or on top of the fridge where it’s slightly warmer.
Step 4: Preheat your oven to 450°F (230°C). Place the Dutch oven with the lid on inside the oven while it preheats for at least 30 minutes. This step is crucial for creating that signature crispy crust on your garlic herb Dutch oven bread.
Step 5: Once the dough has risen and looks puffy with visible bubbles, place it on a lightly floured surface. Gently shape it into a round ball by folding the edges toward the center. Don’t overwork it – you want to keep those air pockets.
Step 6: Carefully remove the hot Dutch oven from the oven using oven mitts (it will be extremely hot). Place a piece of parchment paper inside and place the dough ball on top of the parchment. Use a sharp knife or bread lame to make 2-3 slashes on top of the dough about ¼ inch deep.
Step 7: Put the lid back on the Dutch oven and bake for 30 minutes. The lid traps steam, which helps create that bakery-style crust.
Step 8: After 30 minutes, remove the lid and bake for another 10-15 minutes, or until the crust is deep golden brown and sounds hollow when tapped. The internal temperature should reach 200-210°F if you want to check with a thermometer.
Step 9: Carefully remove the bread from the Dutch oven using the parchment paper as handles and place it on a wire rack. Immediately brush the top with the melted butter for extra flavor and shine.
Step 10: Let the bread cool for at least 30 minutes before slicing and serving. I know it’s tempting to cut into it right away, but the interior is still cooking as it cools, and cutting too early can make it gummy.
Common mistake to avoid: Don’t use water that’s too hot for the yeast. If you can’t comfortably hold your finger in it for a few seconds, it’s too hot and will kill the yeast.
Perfect Pairings for Garlic Herb Bread
This crusty bread pairs beautifully with just about anything, but some combinations are truly magical.
Creamy Tomato Soup: The herb-flecked crust is perfect for dunking into rich, tangy tomato soup. The garlic complements the acidity beautifully.
Roasted Chicken: Serve slices alongside roasted chicken to soak up all those delicious pan juices. The Parmesan in the bread echoes nicely with Italian-seasoned poultry.
Italian Pasta Dishes: Whether it’s spaghetti marinara or creamy Alfredo, this garlic herb Dutch oven bread makes an excellent side for mopping up sauce.
Fresh Green Salad: Toast thick slices and serve alongside a crisp salad for a simple lunch. The contrast of textures is wonderfully satisfying.
Charcuterie Board: Slice and serve with cured meats, cheeses, and olives for an impressive appetizer spread.
More Comforting Recipes to Enjoy
This garlic herb Dutch oven bread pairs wonderfully with hearty comfort food that brings people together around the table. For a cozy meal, serve warm slices alongside Creamy Tuscan Garlic Tortellini Soup the herb-flecked crust is perfect for dunking into the rich, garlicky broth. Another fantastic pairing is Rosemary Roasted Garlic Bean Soup, which echoes the rosemary and garlic flavors in the bread itself.
For a complete Italian-inspired spread, this crusty bread makes an excellent accompaniment to Creamy Ravioli Soup or Tuscan Ravioli Soup. The bread’s crispy exterior and soft interior are ideal for soaking up every last drop of these satisfying soups. These recipes create a restaurant-quality meal experience right in your own kitchen.

Keeping Your Bread Fresh
Store your garlic herb Dutch oven bread in a paper bag or loosely wrapped in a tea towel at room temperature for up to 2 days. I find that plastic wrap makes the crust soft, which is why I avoid it.
For reheating, place slices in a 350°F (175°C) oven for 5-7 minutes, or the whole loaf for 10-15 minutes until warmed through. This brings back that just-baked texture and makes your kitchen smell amazing all over again.
Pro tip: This bread freezes beautifully. Once completely cooled, wrap it tightly in plastic wrap and then in aluminum foil. Freeze for up to 3 months. Thaw at room temperature, then refresh in a warm oven before serving.
Your Questions About Dutch Oven Bread, Answered
Can I use instant yeast instead of active dry yeast?
Yes, absolutely. Use the same amount and mix it directly with the dry ingredients. No need to proof it first.
What if I don’t have fresh herbs?
Dried herbs work fine – just use 1 teaspoon total instead of 1 tablespoon since dried herbs are more concentrated. You can also skip the herbs entirely for a simple garlic parmesan bread.
My bread came out dense and didn’t rise well. What happened?
Most likely your yeast was expired or the water was too hot and killed the yeast. Make sure your yeast foams when mixed with warm water and sugar, and always check the temperature of your water.
Time to Bake Your Best Bread Yet
This garlic herb Dutch oven bread proves that impressive homemade bread doesn’t require hours of kneading or professional skills. With just a few simple ingredients and a hot Dutch oven, you can create bakery-quality bread right in your own kitchen. The crispy crust, fluffy interior, and aromatic garlic herb flavor make this recipe one you’ll return to again and again. Try this recipe and discover just how easy and rewarding bread baking can be!
Garlic Herb Dutch Oven Bread

Easy no-knead garlic herb Dutch oven bread with crispy crust and soft interior. Perfect beginner-friendly recipe.
- Prep Time: 10 minutes
- Cook Time: 45 minutes
- Total Time: 2 hours 45 minutes
- Yield: 1 loaf (8-10 slices) 1x
- Category: Bread
- Method: Bake
- Cuisine: American
- Diet: Vegetarian
Ingredients
- 3 ¼ cups (400g) all-purpose flour
- 2 ¼ tsp (7g) active dry yeast
- 1 ½ tsp salt
- 1 tbsp sugar
- 1 ½ cups (360ml) warm water (110-115°F)
- 3 cloves garlic, minced
- 1 tbsp fresh chopped herbs (like rosemary, thyme, or parsley)
- ½ cup (50g) grated Parmesan cheese
- 2 tbsp unsalted butter, melted
Instructions
- In a large bowl, whisk together the flour, yeast, salt, and sugar until evenly combined.
- Add the warm water (110-115°F), minced garlic, chopped herbs, and Parmesan cheese. Stir with a wooden spoon until a shaggy, sticky dough forms, ensuring all flour is incorporated.
- Cover the bowl with plastic wrap or a clean kitchen towel and let rise in a warm place for 1.5 to 2 hours, or until doubled in size.
- Preheat oven to 450°F (230°C). Place the Dutch oven with lid inside and preheat for at least 30 minutes.
- Place risen dough on a lightly floured surface and gently shape into a round ball.
- Carefully remove hot Dutch oven. Place parchment paper inside, add dough ball, and use a sharp knife to make 2-3 slashes on top.
- Put lid back on Dutch oven and bake for 30 minutes.
- Remove lid and bake another 10-15 minutes until crust is deep golden brown and sounds hollow when tapped.
- Remove bread using parchment paper and place on wire rack. Immediately brush top with melted butter.
- Let bread cool for at least 30 minutes before slicing and serving.
Notes
- Water temperature is crucial – too hot will kill the yeast. It should feel like a comfortable bath (110-115°F).
- Preheating the Dutch oven for 30 minutes creates the signature crispy crust.
- A 4-6 quart Dutch oven works best for this recipe.
- Mix of rosemary and thyme gives the most aromatic flavor, but any fresh herbs work.
- Don’t skip parchment paper – it prevents burning and makes removal easier.
Nutrition
- Serving Size: 1 slice (1/8 of loaf)
- Calories: 185 kcal
- Sugar: 2 g
- Sodium: 380 mg
- Fat: 4 g
- Saturated Fat: 2 g
- Unsaturated Fat: 2 g
- Trans Fat: 0 g
- Carbohydrates: 32 g
- Fiber: 1 g
- Protein: 6 g
- Cholesterol: 8 mg


