

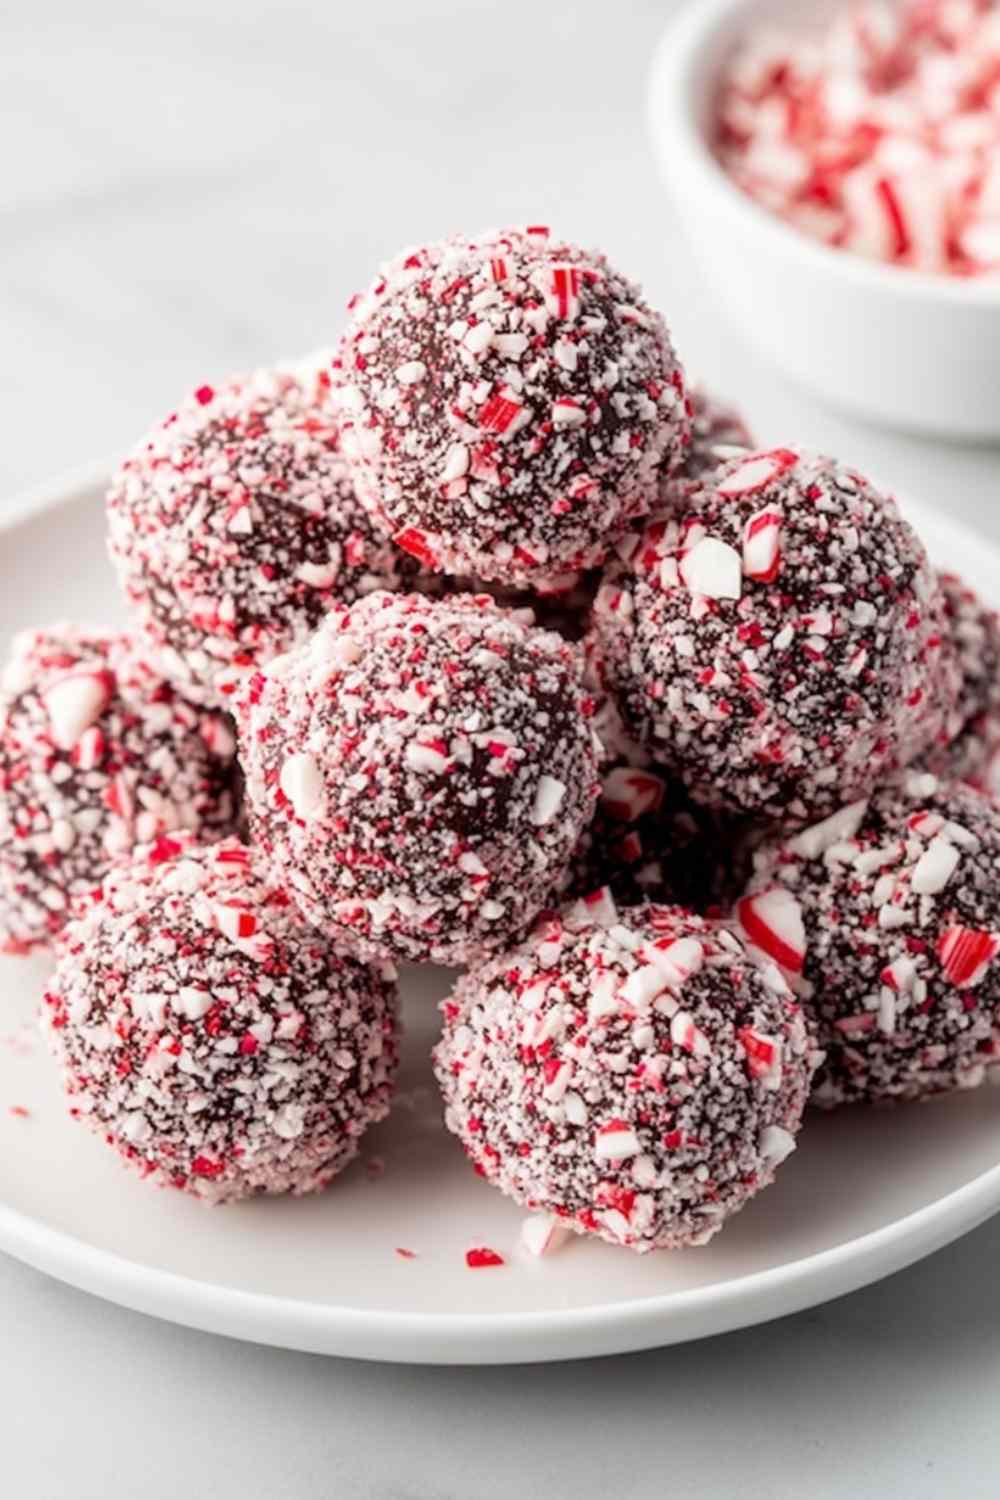
Peppermint Oreo Balls are my absolute favorite holiday treat to make when I need something festive, delicious, and incredibly easy. These no-bake cookies-and-cream bites get coated in smooth white chocolate and topped with crushed candy canes for the perfect Christmas dessert.
I started making these Peppermint Oreo Balls about five years ago when I needed a last-minute treat for a holiday cookie exchange. I was amazed at how something so simple could taste so incredible. The combination of crushed Oreos, creamy filling, and peppermint coating creates the perfect balance of sweet and minty. Now, they’re a staple on my Christmas dessert table every year. The best part? You only need four basic ingredients and about 20 minutes of hands-on prep time. These festive Oreo truffles disappear fast at every party, and everyone always asks for the recipe.
Table of Contents
What You’ll Need for Perfect Peppermint Oreo Balls
I always use regular Oreos for this recipe, but peppermint-flavored Oreos work beautifully if you want an extra minty kick. Pro tip: make sure your cream cheese is fully softened to room temperature so it mixes smoothly with the cookie crumbs.
- 36 Oreo cookies (regular or peppermint variety)
- 8 ounces cream cheese, softened to room temperature
- 12 ounces white chocolate chips or melting wafers
- 1/2 teaspoon peppermint extract
- 4 candy canes, finely crushed for topping
Personal recommendation: I prefer using white chocolate melting wafers instead of chips because they melt more smoothly and create a better coating consistency. You’ll also need a food processor or rolling pin, mixing bowl, baking sheets, and parchment paper.

How to Make These Festive Treats Step-by-Step
I recommend working quickly when dipping the frozen balls so the chocolate doesn’t harden before you add the candy cane topping. If your chocolate starts to thicken while dipping, simply microwave it for 10-15 seconds to thin it back out.
Step 1: Line a large baking sheet with parchment paper and set it aside.
Step 2: Add the Oreo cookies to your food processor and pulse 8-10 times until you have fine, uniform crumbs. If you don’t have a food processor, place the cookies in a large Ziploc bag and crush them with a rolling pin until they look like dark sand.
Step 3: Transfer the Oreo crumbs to a large mixing bowl and add the softened cream cheese. Mix thoroughly with a sturdy spoon or rubber spatula until a thick, cohesive dough forms with no cream cheese streaks remaining. This should take about 2-3 minutes of mixing.
Step 4: Using a small cookie scoop or your hands, portion out the mixture and roll into 1-inch balls. You should get approximately 30-36 Peppermint Oreo Balls depending on size. Place them on your prepared baking sheet as you go.
Step 5: Transfer the baking sheet to your freezer and chill the balls for at least 30 minutes. They need to be firm before dipping or they’ll fall apart in the melted chocolate.
Step 6: When the balls are almost done chilling, melt your white chocolate in the microwave using 30-second intervals, stirring between each one. This usually takes 1.5-2 minutes total. Don’t overheat past 115°F or the chocolate can seize. Once smooth, stir in the peppermint extract. Pro tip: add 1 teaspoon of coconut oil or vegetable shortening to thin the chocolate slightly for easier dipping.
Step 7: Remove the frozen balls from the freezer. Working in small batches of 5-6 balls, place each ball on a fork or dipping tool, lower it into the melted white chocolate, and roll gently to coat completely. Lift it out, tap the fork gently on the bowl edge to remove excess chocolate, then slide it back onto the parchment paper.
Step 8: Immediately sprinkle crushed candy canes over the top of each coated ball before the chocolate sets. The topping needs to stick to wet chocolate.
Step 9: Once all balls are coated and decorated, refrigerate them for at least 1 hour until the chocolate coating is completely firm and set.
Perfect Pairings for Your Holiday Dessert Spread
These peppermint treats pair wonderfully with rich hot chocolate or creamy eggnog at holiday gatherings.
Hot Chocolate: The cool mint flavor contrasts beautifully with warm, rich cocoa for a classic Christmas combination.
Peppermint Coffee: Serve these Oreo balls alongside flavored coffee drinks for a complete dessert experience that highlights the minty notes.
Sugar Cookies: Combine them on a platter with classic sugar cookies and gingerbread for variety in texture and flavor at cookie exchanges.
Vanilla Ice Cream: Crumble a Peppermint Oreo Ball over vanilla ice cream for an indulgent sundae with amazing texture contrast.
More Delicious Treats to Complete Your Holiday Menu
These festive Peppermint Oreo Balls pair beautifully with other holiday desserts that bring seasonal joy to the table. For more no-bake holiday treats, try the delightful Peppermint Brownie Cookies which share the same minty chocolate flavor profile, or the elegant Cannoli Cheesecake Bars for an Italian-inspired sweet finish.
When planning a complete holiday menu, serve these Oreo balls as dessert after hearty main courses like the comforting Creamy Tuscan Chicken, festive Cranberry Orange Glazed Chicken, or the impressive Slow Braised Beef Roast with Cranberry Balsamic Glaze. The cool peppermint flavor provides a refreshing contrast to rich, savory holiday dishes.

Storing Your Peppermint Oreo Balls for Maximum Freshness
I recommend storing these in a single layer if possible to prevent the candy cane topping from getting crushed. Keep them refrigerated in an airtight container for up to 2 weeks, separating layers with parchment paper if stacking. The chocolate coating stays firm and beautiful when properly chilled.
For longer storage, freeze your Peppermint Oreo Balls in a freezer-safe container for up to 3 months. Pro tip: let them thaw in the refrigerator for about 30 minutes before serving so the texture softens slightly while the coating stays intact.
These treats are actually perfect served cold straight from the fridge. The firm chocolate shell gives way to a soft, creamy center that’s incredibly satisfying. I find they taste best when enjoyed chilled rather than at room temperature.
Common Questions About Making Peppermint Oreo Balls
Can I use regular chocolate instead of white chocolate?
Absolutely! Dark chocolate or milk chocolate both work wonderfully with these Oreo balls. Just skip the peppermint extract if using dark chocolate, as the mint flavor can clash with the more bitter notes.
Why did my Oreo balls fall apart when dipping?
This usually happens when the balls weren’t frozen long enough before coating. Make sure they’re completely firm and frozen solid. If they start to soften while you’re working, pop them back in the freezer for 10 minutes.
Can I make Peppermint Oreo Balls ahead of time?
Yes! These are perfect make-ahead treats. Prepare them up to 2 weeks in advance and store them in the refrigerator, or freeze them for up to 3 months. They’re actually easier to work with when made a day ahead because the flavors meld together beautifully.
Ready to Make These Festive Treats?
These Peppermint Oreo Balls prove that impressive holiday desserts don’t have to be complicated. With just four ingredients and minimal effort, you’ll have a beautiful, delicious treat that everyone will love. The combination of cookies, cream, and peppermint creates something truly special that captures the magic of the season. Try this recipe and watch them disappear from your dessert table!
Peppermint Oreo Balls: Easy No-Bake Holiday Treats

Easy no-bake Peppermint Oreo Balls made with just 4 simple ingredients. Perfect festive holiday treats coated in white chocolate with candy cane topping.
- Prep Time: 20 minutes
- Cook Time: 0 minutes
- Total Time: 110 minutes
- Yield: 30–36 balls 1x
- Category: Dessert
- Method: No-Bake
- Cuisine: American
- Diet: Vegetarian
Ingredients
- 36 Oreo cookies (original or peppermint)
- 8 ounces cream cheese, softened
- 12 ounces white chocolate chips or melting wafers
- 1/2 teaspoon peppermint extract
- 4 candy canes, crushed (for topping)
Instructions
- Line a large baking sheet with parchment paper.
- Place the Oreo cookies in a food processor and pulse until fine crumbs form. Alternatively, place them in a Ziploc bag and crush with a rolling pin.
- In a large bowl, combine the Oreo crumbs and the softened cream cheese. Mix with a spoon or spatula until a thick, uniform dough forms.
- Using a small cookie scoop or your hands, roll the mixture into 1-inch balls and place them on the prepared baking sheet.
- Freeze the balls for at least 30 minutes until firm.
- Melt the white chocolate according to package directions, usually in 30-second intervals in the microwave. Stir in the peppermint extract.
- Using a fork or a dipping tool, dip each frozen Oreo ball into the melted white chocolate, coating it completely. Tap off any excess chocolate.
- Place the coated balls back on the parchment paper. Immediately sprinkle with crushed candy canes before the chocolate sets.
- Refrigerate for at least 1 hour until the chocolate is firm.
Notes
- Chilling the Oreo balls before dipping is crucial. If they are not firm enough, they may fall apart in the melted chocolate.
- Do not overheat the white chocolate past 115°F, as it can seize and become unusable. Melt it slowly and gently.
- For a smoother coating, add a teaspoon of coconut oil or vegetable shortening to the white chocolate while melting.
- Use peppermint Oreos for an extra burst of mint flavor.
Nutrition
- Serving Size: 1 Oreo ball
- Calories: 95 kcal
- Sugar: 9 g
- Sodium: 65 mg
- Fat: 5 g
- Saturated Fat: 2.5 g
- Unsaturated Fat: 2 g
- Trans Fat: 0 g
- Carbohydrates: 12 g
- Fiber: 0 g
- Protein: 1 g
- Cholesterol: 8 mg


