

Peanut Butter Rice Krispie Treats are the ultimate no-bake dessert when you need something quick, gooey, and packed with nostalgic flavor. I made my first batch on a rainy Saturday afternoon when my daughter was six, and we went through the entire pan before dinner.
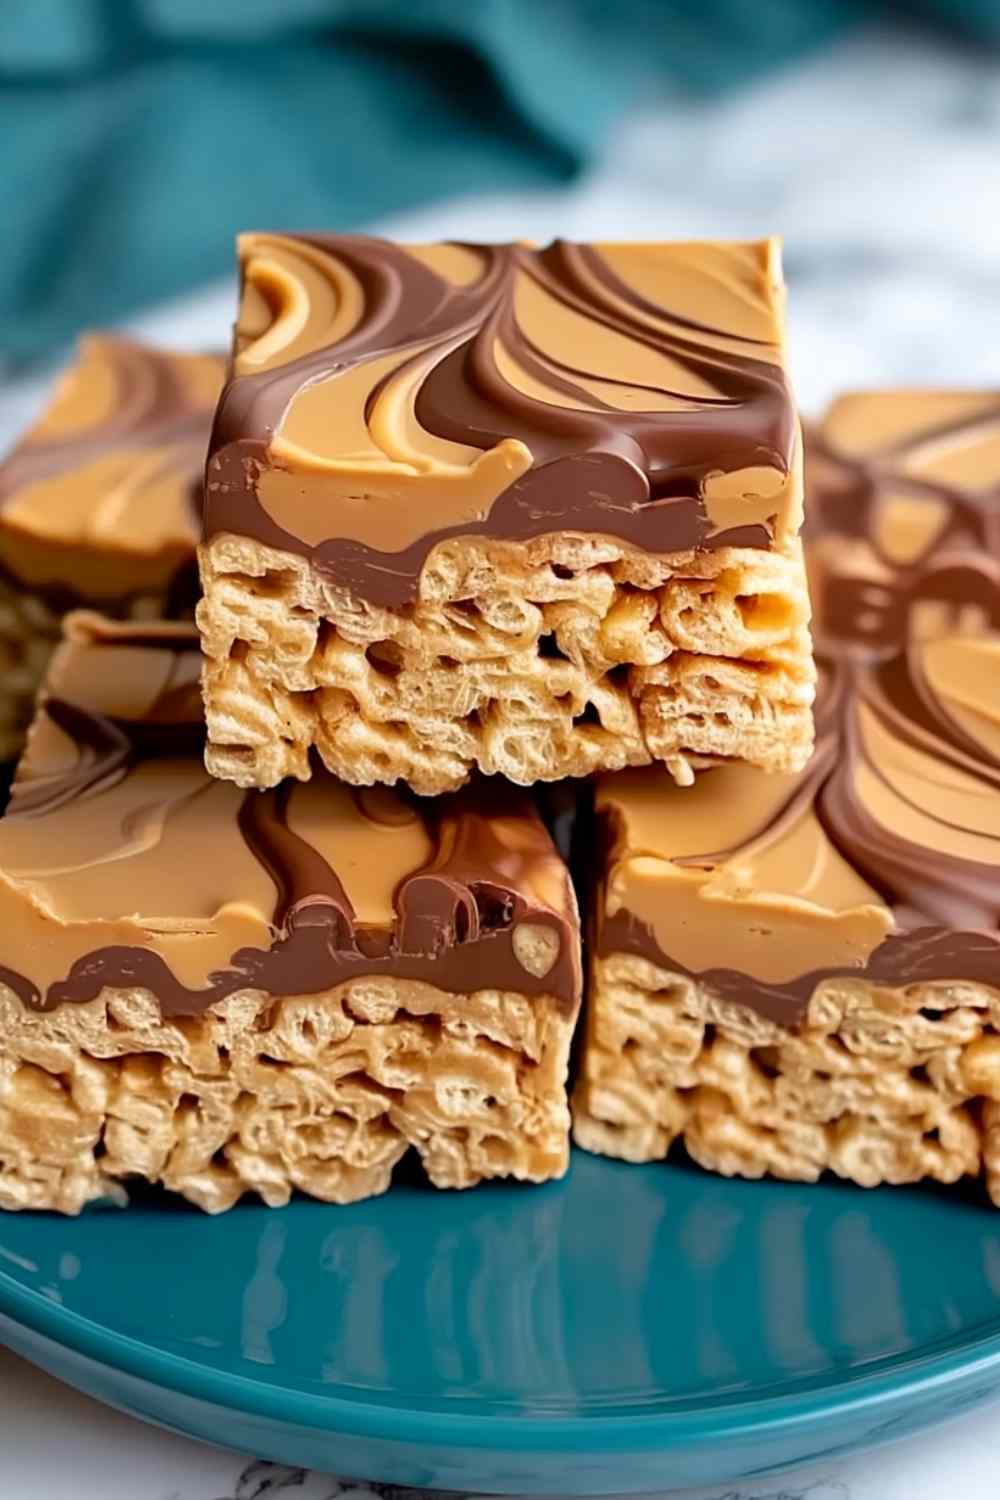
What I love most about this recipe is how it takes a classic childhood favorite and elevates it with rich, creamy peanut butter. The combination of melted marshmallows and peanut butter creates an incredibly gooey texture that stays soft for days. These peanut butter cereal bars come together with just six simple ingredients and about 15 minutes of active work. There’s no oven required, making them perfect for summer gatherings, last-minute potlucks, or when you just want a sweet treat without the hassle. The best part? They stay soft and chewy for days, though they rarely last that long in my house.
Table of Contents
What You’ll Need for These Gooey Treats
I always use fresh marshmallows for this recipe because stale ones will make your treats hard and dense. Pro tip: measure out your Rice Krispies cereal before you start melting anything so you can work quickly once the marshmallow mixture is ready.
- 6 cups Rice Krispies cereal
- 1/2 cup (1 stick) unsalted butter
- 1 (10 oz) bag mini marshmallows
- 1/2 cup creamy peanut butter (I prefer Skippy or Jif for consistent results)
- 1 teaspoon vanilla extract
- 1/4 teaspoon salt (enhances the peanut butter flavor beautifully)
My personal recommendation: For an extra indulgent version, I sometimes add 1/2 cup of chocolate chips or peanut butter chips right before folding in the cereal. The residual heat melts them slightly, creating pockets of melty chocolate throughout.

How to Make Perfect Peanut Butter Rice Krispie Treats
I recommend working quickly once you start this recipe because the marshmallow mixture sets fast. Have everything measured and your pan prepared before you begin melting anything.
Step 1: Prepare a 9×13 inch baking dish by lining it with parchment paper, leaving some overhang on the sides. This makes lifting the treats out so much easier later. Lightly spray the parchment with non-stick spray.
Step 2: In a large pot or saucepan, melt the butter over medium-low heat. Watch it carefully and don’t let it brown. This takes about 2-3 minutes.
Step 3: Once the butter is melted, add the entire bag of mini marshmallows. Stir constantly with a wooden spoon or silicone spatula until the marshmallows are completely melted and the mixture is smooth, about 3-4 minutes. The mixture should look glossy and unified with no marshmallow lumps remaining.
Step 4: Remove the pot from the heat immediately. Stir in the creamy peanut butter, vanilla extract, and salt until everything is well combined and smooth. The peanut butter will melt into the marshmallow mixture, creating a beautiful tan-colored base. Work quickly here as the mixture will start to set.
Step 5: Pour the Rice Krispies cereal into the pot. Using your spatula, gently fold the cereal into the marshmallow peanut butter mixture until every piece is evenly coated. Don’t overmix or the cereal will break down.
Step 6: Quickly transfer the mixture to the prepared baking dish. Using a spatula or your hands (lightly greased with butter or non-stick spray), gently press the mixture into an even layer about 1 inch thick. This is crucial: be careful not to press too hard, as this can compress the air pockets and make the peanut butter Rice Krispie treats dense instead of light and chewy.
Step 7: Let the treats cool completely at room temperature for at least one hour before cutting. Resist the urge to refrigerate them as this will make them hard.
Step 8: Once cooled, use the parchment paper overhangs to lift the treats out of the dish. Cut into 12 squares (3×4 grid) using a sharp knife, wiping the blade between cuts for clean edges.
Common mistake to avoid: Don’t overcook your marshmallows or leave them on the heat too long after they’ve melted. This causes the sugar to harden and results in rock-hard treats that are difficult to chew. I learned this the hard way my first time making these when I got distracted answering the phone.
Perfect Pairings for Your No-Bake Treats
These sweet peanut butter bars pair wonderfully with beverages and simple accompaniments that complement their rich, gooey texture.
Cold Milk: The classic pairing that cuts through the sweetness and brings out the peanut butter flavor even more.
Hot Coffee: The slight bitterness of coffee balances the sweet marshmallow perfectly, making these treats an excellent afternoon snack for adults.
Fresh Fruit: Sliced strawberries or banana slices add a fresh element and work beautifully with the peanut butter flavor profile.
Vanilla Ice Cream: Serve a square alongside a scoop of vanilla ice cream for an over-the-top dessert that’s perfect for summer gatherings.
More Sweet Treats to Try
These no-bake peanut butter treats are perfect for anyone looking for quick desserts that don’t require turning on the oven. For more simple cookie recipes, the White Chocolate Candy Cane Cookies offer a festive twist with minimal effort, while Cake Batter Cookies bring that classic bakery flavor home. Both pair beautifully with these peanut butter bars on a dessert platter.
When planning a complete meal before serving dessert, consider starting with something hearty and satisfying. The Loaded Beef Bacon Cheeseburger Pasta makes a filling main course that kids love, or try the comforting Crockpot Mac and Cheese for an easy dinner solution. For a lighter option before these sweet treats, the Chicken Orzo Tomato Soup provides warmth without being too heavy.

Keeping Your Treats Fresh and Delicious
Store your peanut butter Rice Krispie treats in an airtight container at room temperature for up to 3 days. I use a plastic container with a tight-fitting lid or wrap them individually in plastic wrap. Never refrigerate these treats as the cold temperature will make them hard and lose their signature chewy texture.
If you need to transport them, keep them in a single layer separated by parchment paper to prevent sticking. They travel well to potlucks and picnics since they don’t require refrigeration.
Pro tip: These treats actually taste even better on day two after the flavors have had time to meld together. The peanut butter flavor becomes more pronounced and the texture reaches peak gooeyness. For longer storage, you can freeze them for up to 2 months. Wrap individual squares tightly in plastic wrap, then place in a freezer bag. Thaw at room temperature for about 30 minutes before serving.
Your Questions About Peanut Butter Rice Krispie Treats Answered
Can I use crunchy peanut butter instead of creamy?
Yes, crunchy peanut butter works well and adds extra texture to your treats. The pieces of peanuts provide a nice contrast to the soft, chewy marshmallow base.
Why did my treats turn out hard?
Hard peanut butter Rice Krispie treats usually result from overcooking the marshmallows, using stale marshmallows, or pressing the mixture too firmly into the pan. Make sure to work on low heat and press gently for the softest results.
Can I make these dairy-free?
Absolutely! Use dairy-free butter and check that your marshmallows are vegan-friendly. Many brands now make vegan marshmallows that work perfectly in this recipe.
Time to Make These Irresistible Treats
These Peanut Butter Rice Krispie Treats prove that the best desserts don’t have to be complicated. With just a few minutes of hands-on time and ingredients you probably already have in your pantry, you can create something truly special that both kids and adults will devour. The combination of gooey marshmallows and creamy peanut butter transforms simple cereal into an addictive treat that’s perfect for any occasion. Try this recipe and watch them disappear before your eyes!
Peanut Butter Rice Krispie Treats

Extra gooey no-bake dessert packed with rich peanut butter flavor. Beginner-friendly recipe with just 15 minutes active time.
- Prep Time: 5 minutes
- Cook Time: 8 minutes
- Total Time: 1 hour 15 minutes
- Yield: 12 squares 1x
- Category: Dessert
- Method: No-Bake
- Cuisine: American
- Diet: Vegetarian
Ingredients
- 6 cups Rice Krispies cereal
- 1/2 cup (1 stick) unsalted butter
- 1 (10 oz) bag mini marshmallows
- 1/2 cup creamy peanut butter
- 1 teaspoon vanilla extract
- 1/4 teaspoon salt
Instructions
- Prepare a 9×13 inch baking dish by lining it with parchment paper, leaving some overhang on the sides. Lightly spray with non-stick spray.
- In a large pot or saucepan, melt the butter over medium-low heat for 2-3 minutes. Watch carefully and don’t let it brown.
- Add the entire bag of mini marshmallows and stir constantly until completely melted and smooth, about 3-4 minutes. Mixture should look glossy with no lumps.
- Remove from heat immediately. Stir in creamy peanut butter, vanilla extract, and salt until well combined and smooth. Work quickly as mixture will start to set.
- Pour Rice Krispies cereal into the pot. Gently fold the cereal into the marshmallow mixture until evenly coated. Don’t overmix.
- Quickly transfer mixture to prepared baking dish. Using a lightly greased spatula or hands, gently press into an even layer about 1 inch thick. Do not press too hard or treats will be dense.
- Let treats cool completely at room temperature for at least one hour before cutting. Do not refrigerate.
- Use parchment overhangs to lift treats from dish. Cut into 12 squares using a sharp knife, wiping blade between cuts for clean edges.
Notes
- Use fresh marshmallows for best texture. Stale marshmallows result in hard treats.
- Do not overcook marshmallows or leave on heat after melting. This causes hard treats.
- Press gently into pan to maintain light, chewy texture. Pressing too hard makes them dense.
- Store at room temperature only in airtight container. Refrigeration makes them hard.
- For extra indulgence, add 1/2 cup chocolate chips or peanut butter chips with the cereal.
- Standard marshmallow bags are 10 oz. If using a larger bag, measure out 4 cups of marshmallows.
Nutrition
- Serving Size: 1 square (1/12 of recipe)
- Calories: 230 kcal
- Sugar: 20 g
- Sodium: 150 mg
- Fat: 10 g
- Saturated Fat: 4 g
- Unsaturated Fat: 5 g
- Trans Fat: 0 g
- Carbohydrates: 33 g
- Fiber: 0 g
- Protein: 4 g
- Cholesterol: 10 mg


