

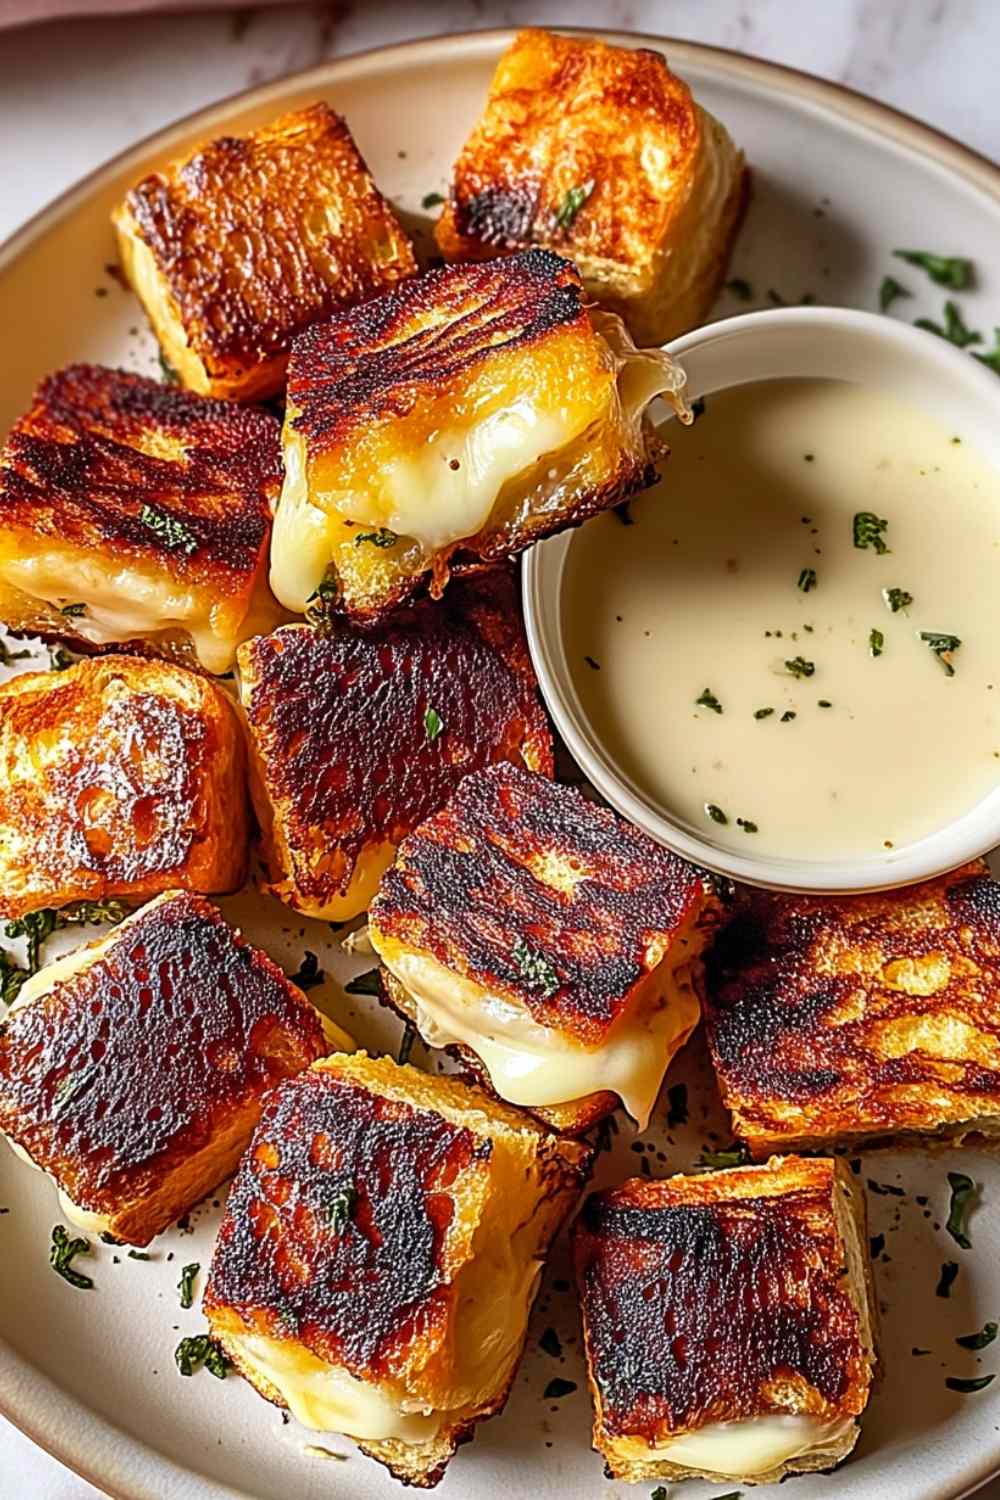
Hawaiian Roll Grilled Cheese is one of those recipes that makes everyone smile. The moment you bite into these sweet, buttery rolls with melted cheese, you understand why they’ve become a favorite in my kitchen. I first made these for a casual lunch, and now they’re my go-to whenever I need something quick and crowd-pleasing.
There’s something magical about the contrast between sweet Hawaiian rolls and savory melted cheese. I remember the first time I pulled a pan of these from the oven – the golden, buttery tops and that irresistible cheese pull had my family hovering around the kitchen. This Hawaiian Roll Grilled Cheese recipe takes minimal effort from start to finish, making it perfect for busy weeknights or lazy weekends. The best part? You can customize them with your favorite cheese or add extras like bacon or tomatoes. Whether you’re feeding hungry kids or hosting a casual get-together, these cheesy Hawaiian roll sandwiches deliver comfort food satisfaction every single time.
Table of Contents
What You’ll Need for Perfect Hawaiian Roll Grilled Cheese
I always keep Hawaiian rolls on hand because they’re incredibly versatile. For this Hawaiian Roll Grilled Cheese, you’ll need just a few simple ingredients that come together beautifully. Pro tip: I prefer using a mix of cheeses for extra flavor depth.
- 12 Hawaiian sweet rolls
- 12 slices of American cheese (or cheddar, provolone, or your favorite melting cheese)
- 4 tablespoons butter, softened
- 1 tablespoon mayonnaise (optional, but I recommend it for extra richness)
My personal tip: I like using a combination of American and cheddar cheese for the best melt and flavor. American cheese melts smoothly while cheddar adds a sharper taste that balances the sweetness of the rolls perfectly.

How to Make Hawaiian Roll Grilled Cheese Step by Step
I recommend preheating your oven first so it’s ready when you need it. This Hawaiian Roll Grilled Cheese method keeps the rolls connected, making assembly super easy and ensuring even baking throughout.
Step 1: Preheat your oven to 350°F (175°C). Line a baking sheet with parchment paper for easy cleanup.
Step 2: Carefully slice the entire block of Hawaiian rolls in half horizontally using a serrated knife. Keep them connected as one unit – this makes assembly much easier. Place the bottom half on your prepared baking sheet.
Step 3: Layer the cheese slices evenly over the bottom half of the rolls. I overlap them slightly to ensure every bite has plenty of cheese. Make sure to cover the entire surface right to the edges.
Step 4: Place the top half of the rolls over the cheese layer. Press down gently to secure everything together.
Step 5: In a small bowl, mix the softened butter with mayonnaise until smooth and creamy. The mayo adds moisture and helps create a beautiful golden crust. If you skip the mayo, just use butter alone.
Step 6: Using a pastry brush, spread the butter mixture generously over the top of the rolls. Make sure to cover every inch for even browning. I brush it all the way to the edges and let some drip down the sides for extra flavor.
Step 7: Bake for 10-15 minutes, watching closely. You’ll know your Hawaiian Roll Grilled Cheese is ready when the cheese is melted and bubbling at the edges and the tops turn golden brown. Pro tip: Check at 10 minutes because the sugar in Hawaiian rolls can cause them to brown quickly.
Step 8: Remove from the oven and let cool for 1-2 minutes. This brief rest makes cutting easier and prevents cheese burns. Use a sharp knife to cut between the individual rolls.
Troubleshooting tip: If your cheese isn’t fully melted but the tops are browning too fast, tent the pan loosely with aluminum foil and bake for an additional 3-5 minutes.
Best Side Dishes to Serve with Hawaiian Roll Grilled Cheese
These sweet and savory sandwiches pair wonderfully with both classic and creative sides.
Tomato Soup: The ultimate comfort food pairing – the acidity and richness of tomato soup balances the sweet, cheesy Hawaiian Roll Grilled Cheese perfectly for a classic lunch combination.
Garden Salad with Vinaigrette: A crisp, fresh salad with tangy dressing cuts through the richness and adds nutritious vegetables to your meal.
Sweet Potato Fries: The natural sweetness complements the Hawaiian rolls while adding a satisfying crunch and extra nutrients.
Fruit Salad: Fresh seasonal fruit provides a light, refreshing contrast to the warm, cheesy sandwiches and works especially well for brunch or casual gatherings.
Pickle Spears: Tangy, crunchy pickles offer the perfect acidic contrast to balance the sweet rolls and rich cheese, making them an ideal side for Hawaiian roll grilled cheese sandwiches.
Perfect Pairings for Your Next Meal
These Hawaiian Roll Grilled Cheese sandwiches are incredibly versatile and pair beautifully with hearty soups and comforting dishes. For a classic lunch combination, serve them alongside warm Garlic Potato Soup or rich Creamy Taco Soup – the creamy, savory flavors complement the sweet rolls perfectly. The cheesy sandwiches also make excellent appetizers before enjoying main courses like Creamy Tuscan Chicken.
For casual gatherings or game day spreads, these grilled cheese bites work wonderfully alongside other crowd-pleasers. Try pairing them with Garlic Bread Rolls for a carb-lovers feast, or serve as appetizers before Crockpot French Dip Sandwiches. The sweet and savory combination makes them an ideal complement to Baked Ham and Cheese Sliders for a complete sandwich spread.

Storing and Reheating Your Hawaiian Roll Grilled Cheese
I recommend storing any leftover Hawaiian Roll Grilled Cheese in an airtight container in the refrigerator for up to 2 days. While they’re best enjoyed fresh, proper storage keeps them tasty for quick meals.
For reheating, I prefer using a toaster oven or regular oven at 350°F for 5-7 minutes. This method helps restore the crispy exterior while melting the cheese again. Avoid the microwave if possible – it makes the rolls soggy and the cheese rubbery.
Pro tip: If you’re making these Hawaiian Roll Grilled Cheese sandwiches for a party, you can assemble them up to 2 hours ahead, cover with foil, and refrigerate until ready to bake. Just add a few extra minutes to the baking time if starting from cold.
Common Questions About Hawaiian Roll Grilled Cheese
Can I use different types of cheese for Hawaiian Roll Grilled Cheese?
Absolutely! While American cheese melts beautifully, cheddar, provolone, Swiss, or a combination work wonderfully. I love mixing sharp cheddar with mozzarella for great flavor and stretch.
Why are my Hawaiian rolls burning before the cheese melts?
Hawaiian rolls contain sugar, which causes faster browning. Reduce oven temperature to 325°F and bake longer, or tent with foil once the tops are golden while the cheese finishes melting.
Can I add other ingredients to my Hawaiian Roll Grilled Cheese?
Yes! Ham, bacon, sliced tomatoes, or even a thin layer of jam work great. Just remember that wet ingredients like tomatoes should be patted dry first to prevent sogginess.
Time to Make This Delicious Hawaiian Roll Grilled Cheese
This Hawaiian Roll Grilled Cheese recipe proves that simple ingredients can create something truly special. The sweet and savory combination, quick preparation, and crowd-pleasing results make this a recipe you’ll return to again and again. Whether you’re feeding your family on a busy weeknight or preparing appetizers for guests, these cheesy, golden sandwiches deliver comfort and satisfaction every time. Try this recipe tonight and watch how quickly these Hawaiian Roll Grilled Cheese sandwiches disappear from the plate!
Hawaiian Roll Grilled Cheese

Sweet Hawaiian rolls meet savory melted cheese in this easy comfort food recipe. Perfect for quick lunches or party appetizers.
- Prep Time: 5 minutes
- Cook Time: 15 minutes
- Total Time: 20 minutes
- Yield: 12 sandwiches 1x
- Category: Lunch
- Method: Bake
- Cuisine: American
- Diet: Vegetarian
Ingredients
- 12 Hawaiian sweet rolls
- 12 slices of American cheese or your favorite cheese
- 4 tablespoons butter, softened
- 1 tablespoon mayonnaise (optional)
Instructions
- Preheat your oven to 350°F (175°C) and line a baking sheet with parchment paper.
- Carefully slice the Hawaiian rolls in half horizontally, keeping them connected as a single unit. Place the bottom half on the baking sheet.
- Layer the cheese slices evenly over the bottom half of the rolls, covering the entire surface.
- Place the top half of the rolls over the cheese layer and press down gently.
- In a small bowl, mix together the softened butter and mayonnaise until smooth.
- Using a pastry brush, spread the butter mixture evenly over the top of the rolls, covering all surfaces.
- Bake for 10-15 minutes, or until the cheese is melted and the tops are golden brown. Watch closely to prevent burning.
- Remove from the oven and let cool for 1-2 minutes before cutting between the rolls to separate individual sandwiches.
Notes
- Any melting cheese works well. Try cheddar, provolone, Swiss, or a mix for extra flavor depth.
- The mayonnaise in the butter mixture adds moisture and helps create a beautiful golden crust, but you can use butter alone if preferred.
- Watch closely while baking as Hawaiian rolls brown quickly due to their sugar content.
- Can assemble up to 2 hours ahead, cover with foil, and refrigerate until ready to bake.
Nutrition
- Serving Size: 1 sandwich
- Calories: 280 kcal
- Sugar: 8 g
- Sodium: 520 mg
- Fat: 16 g
- Saturated Fat: 9 g
- Unsaturated Fat: 6 g
- Trans Fat: 0 g
- Carbohydrates: 25 g
- Fiber: 1 g
- Protein: 12 g
- Cholesterol: 45 mg


