

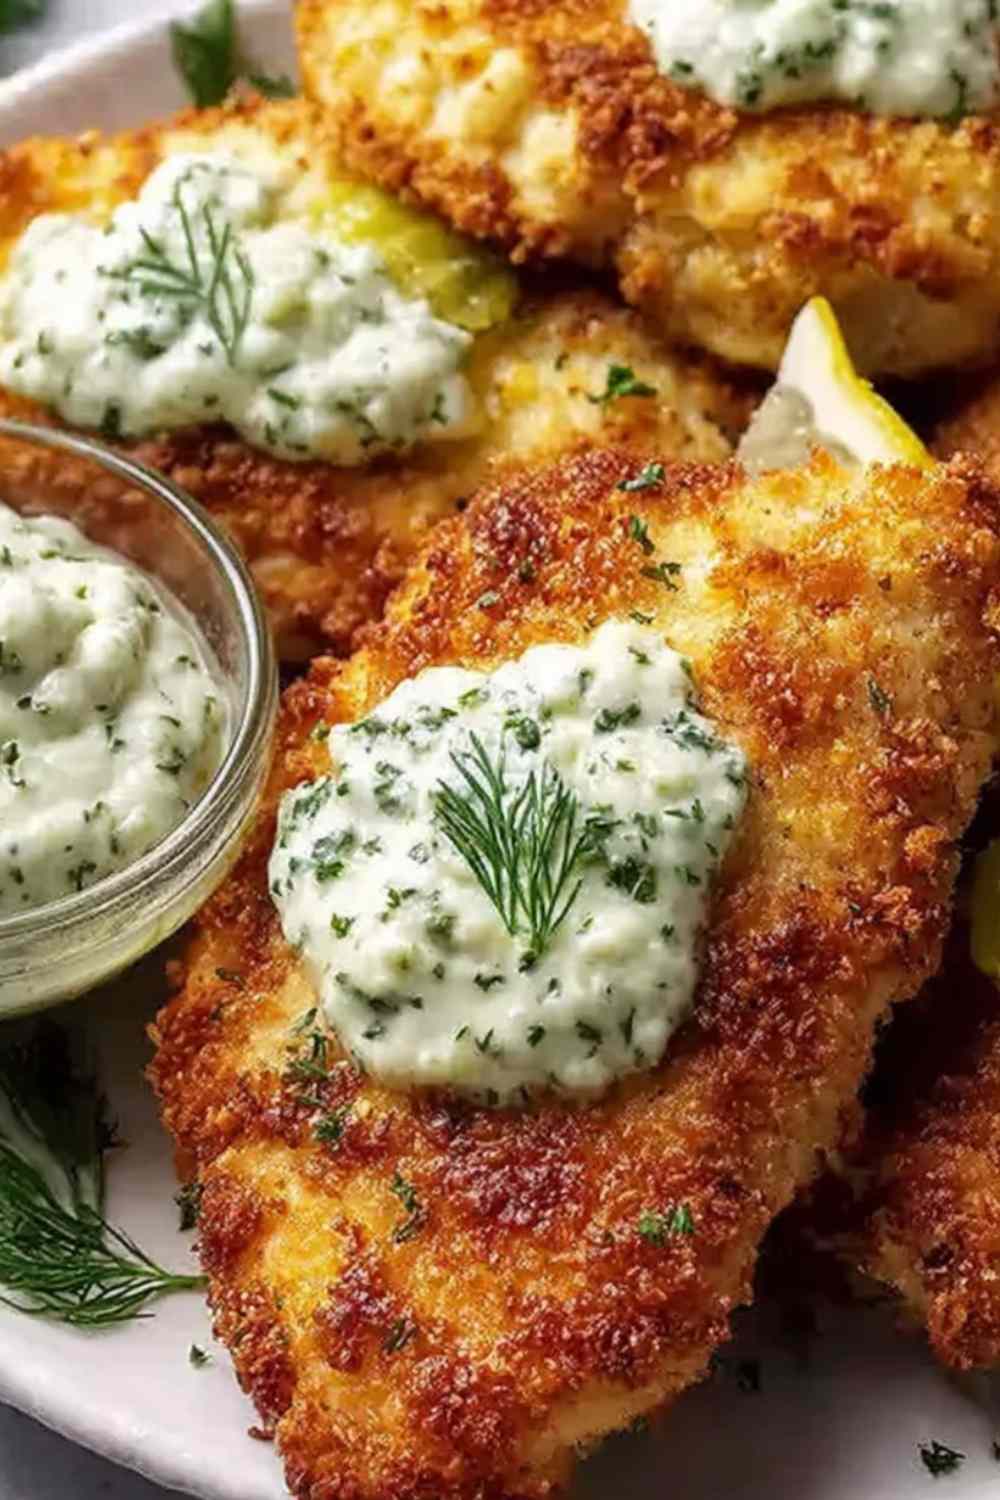
Crispy Dill Pickle Parmesan Chicken is one of those recipes that sounds a little unexpected but ends up being one of the most requested dinners in my rotation. I made this on a busy Tuesday night and my family cleaned their plates before I even got to sit down. If you love the tangy punch of dill pickles paired with a golden, cheesy crust, this one is going to surprise you in the best way.
The first time I threw this together, I honestly was not sure how the pickle flavor would come through in a baked chicken. But that first bite settled it. The pickle juice soaks into the egg wash, and the chopped dill pickles tuck right into the panko coating, giving you this bright, tangy contrast against the savory Parmesan. Fair warning: the first time I made it, I skipped patting the pickles dry and the coating slid right off one side. Little step, big difference. This crispy dill pickle Parmesan chicken is the kind of weeknight dinner that feels a little special without asking much of you.
Table of Contents
Everything You Need for This Crispy Dill Pickle Parmesan Chicken
I always reach for real Parmesan grated fresh from a block for this recipe. Pre-grated cheese has added cellulose that keeps it from crisping up properly in the oven. Pro tip: dry those chopped pickles on a paper towel before mixing them into the panko or the coating will not stick as well.
- 4 boneless, skinless chicken breasts (about 6 oz each)
- 1/2 cup all-purpose flour
- 1 teaspoon garlic powder
- 1 teaspoon paprika
- 1/2 teaspoon salt
- 1/4 teaspoon black pepper
- 2 large eggs, beaten
- 1 cup panko breadcrumbs (Japanese-style panko gives the best crunch)
- 1/2 cup freshly grated Parmesan cheese (from a block, not a can)
- 1/4 cup chopped dill pickles, patted dry
- 2 tablespoons pickle juice (straight from the jar)
- Cooking spray
- Fresh dill for garnish (optional but worth it)
Pro tip: Want more crunch? Add an extra 2 tablespoons of panko to the coating mixture. It makes a noticeable difference.

Step-by-Step Instructions for Baked Dill Pickle Parmesan Chicken
I recommend setting up all three dredging stations before you touch the chicken. It makes the whole process go faster and keeps your hands cleaner. Here is how I always do it.
Step 1: Preheat your oven to 400 degrees F (200 degrees C). Set a wire rack on top of a rimmed baking sheet and coat it lightly with cooking spray. The rack is not optional here. It keeps the bottom of the chicken from sitting in steam and going soft.
Step 2: Place each chicken breast between two sheets of plastic wrap and pound to an even 1/2 inch thickness using a meat mallet. Even thickness means even cooking. Pat each breast completely dry with paper towels before moving on.
Step 3: Set up your three dredging dishes. First dish: flour, garlic powder, paprika, salt, and black pepper, mixed together. Second dish: eggs beaten with the 2 tablespoons of pickle juice. Third dish: panko, grated Parmesan, and the patted-dry chopped pickles, combined.
Step 4: Dredge each chicken breast through the flour first. Shake off the excess well. A thick or clumpy flour layer tends to get gummy during baking.
Step 5: Dip the floured chicken into the egg and pickle juice mixture. Let the extra egg drip off for a second or two.
Step 6: Press the chicken firmly into the panko mixture on both sides. Really press it in. You want the coating packed on, not just dusted on.
Step 7: Place the coated pieces on the wire rack. Lightly spray the tops with cooking spray. This is what gives you that deep golden color without needing to fry.
Step 8: Bake for 20 to 25 minutes total. Flip the chicken at around the 12 to 13 minute mark for even browning on both sides. The coating should look deep golden and feel set when you press it lightly. The internal temperature needs to reach 165 degrees F. If your breasts are thicker than 1/2 inch, add 5 minutes and check again.
Step 9: Let the chicken rest on the rack for 5 minutes before slicing or serving. Cutting too early lets all the juices run out. Garnish with fresh dill if you have it.
Common mistake: If your coating looks pale after 25 minutes, your oven may run cool. Give it an extra 3 to 5 minutes and check again rather than cranking the heat.
Best Sides to Serve with Dill Pickle Parmesan Chicken
This crispy dill pickle Parmesan chicken pairs well with sides that balance its bold, tangy flavor without competing with it. Here are the combinations that work best.
Roasted Baby Potatoes: Starchy and slightly crispy on the outside, these ground the plate and balance the pickle tang perfectly.
Simple Green Salad: A light lemon vinaigrette salad cuts through the richness of the Parmesan crust and keeps the meal from feeling heavy.
Rice Pilaf: Mild, buttery rice is a reliable base that lets the chicken be the star and soaks up any extra juice.
Steamed Broccoli or Green Beans: Light vegetables with a bit of natural sweetness complement the savory notes without clashing.
Sandwich Style: Slice the chicken thin and layer it into a toasted brioche bun or wrap it in a flour tortilla with lettuce, tomato, and an extra pickle for a handheld version the whole family loves.
More Chicken Dinners Worth Trying
If this crispy dill pickle Parmesan chicken hit the spot, there are plenty of other easy baked chicken recipes worth adding to the weeknight lineup. The Parmesan Crusted Chicken and Easy Parmesan Crusted Chicken with Creamy Garlic Sauce both share that same golden, cheesy coating with their own twist, making them great next recipes to try.
For nights when something a little saucier sounds good, the Crispy Parmesan Chicken with Garlic Sauce and the Garlic Parmesan Chicken Bake are both crowd-pleasers that pair well with the same sides suggested above. Any of these make a natural follow-up to this dill pickle version if Parmesan chicken is becoming a household favorite.

How to Store and Reheat Your Crispy Dill Pickle Parmesan Chicken
Leftover crispy dill pickle Parmesan chicken stores really well if you use the right reheating method. Let the chicken cool completely before storing. Keep it in an airtight container in the refrigerator for up to 3 days.
For freezing, wrap each piece individually in plastic wrap and store them in a freezer-safe zip bag for up to 3 months. Thaw overnight in the refrigerator before reheating. To reheat and get that crust crispy again, place the chicken on a wire rack over a baking sheet and warm it in a 350 degree F (175 degree C) oven for 10 to 15 minutes. An air fryer at 375 degrees F for 5 to 7 minutes works even better. Skip the microwave if you can. It makes the coating soft.
Pro tip: Slice leftover chicken and add it to a grain bowl or tuck it into a wrap for lunch the next day. It holds up really well cold too.
Your Questions About Dill Pickle Parmesan Chicken Answered
Can I use chicken thighs instead of chicken breasts?
Yes, boneless skinless chicken thighs work well here. They stay juicy naturally. Bake for 25 to 30 minutes and check for an internal temperature of 165 degrees F.
What if my coating keeps falling off?
Two common reasons: the chicken was not patted dry before dredging, or the panko was not pressed in firmly enough. Make sure the chicken surface is dry before the flour step, and press the coating on with your palm rather than just rolling it around.
Can I make this gluten-free?
Yes. Use a 1-to-1 gluten-free flour blend and gluten-free panko breadcrumbs. The texture comes out very close to the original.
How strong is the pickle flavor in the finished dish?
It comes through as a bright, tangy note rather than an overwhelming pickle taste. If you want more pickle punch, add an extra tablespoon of pickle juice to the egg wash or increase the chopped pickles to 1/3 cup.
Go Make This Crispy Dill Pickle Parmesan Chicken Tonight
This recipe is one of those happy accidents that became a regular in my kitchen. Crispy dill pickle Parmesan chicken delivers a golden, crunchy crust, juicy chicken inside, and that unexpected tang that keeps everyone asking what is in it. It is simple enough to make on a weeknight and satisfying enough to feel like a real dinner win. Give it a try tonight and drop a comment below to let me know how it turned out for you.
Crispy Dill Pickle Parmesan Chicken

A golden, tangy baked chicken recipe coated in panko, Parmesan, and chopped dill pickles. An easy weeknight dinner with a satisfying crunch and bold flavor in every bite.
- Prep Time: 10 minutes
- Cook Time: 25 minutes
- Total Time: 35 minutes
- Yield: 4 servings 1x
- Category: Dinner
- Method: Bake
- Cuisine: American
Ingredients
- 4 boneless, skinless chicken breasts (about 6 oz each)
- 1/2 cup all-purpose flour
- 1 teaspoon garlic powder
- 1 teaspoon paprika
- 1/2 teaspoon salt
- 1/4 teaspoon black pepper
- 2 large eggs, beaten
- 1 cup panko breadcrumbs
- 1/2 cup freshly grated Parmesan cheese
- 1/4 cup chopped dill pickles, patted dry
- 2 tablespoons pickle juice
- Cooking spray
- Fresh dill for garnish (optional)
Instructions
- Preheat oven to 400 degrees F (200 degrees C). Place a wire rack on a rimmed baking sheet and coat lightly with cooking spray.
- Pound each chicken breast to an even 1/2 inch thickness using a meat mallet. Pat completely dry with paper towels.
- In a shallow dish, mix together flour, garlic powder, paprika, salt, and black pepper.
- In a second shallow dish, beat the eggs with the pickle juice until combined.
- In a third shallow dish, combine the panko breadcrumbs, grated Parmesan, and patted-dry chopped pickles.
- Dredge each chicken breast in the flour mixture and shake off the excess. Dip into the egg wash and let extra drip off. Press firmly into the panko mixture on both sides to coat evenly.
- Place coated chicken on the prepared wire rack. Spray the tops lightly with cooking spray.
- Bake for 20 to 25 minutes, flipping at the 12 to 13 minute mark for even browning, until the coating is deep golden and the internal temperature reaches 165 degrees F.
- Let the chicken rest on the rack for 5 minutes before slicing or serving. Garnish with fresh dill if desired.
Notes
- Pat chopped pickles dry on a paper towel before adding to the panko mixture. This helps the coating stick properly and prevents sliding.
- Use freshly grated Parmesan from a block. Pre-grated Parmesan with added cellulose does not crisp up the same way.
- For extra crunch, add 2 extra tablespoons of panko to the coating mixture.
- For a spicier version, add a pinch of cayenne pepper to the flour mixture.
Nutrition
- Serving Size: 1 chicken breast
- Calories: 340 kcal
- Sugar: 1 g
- Sodium: 620 mg
- Fat: 10 g
- Saturated Fat: 3 g
- Unsaturated Fat: 6 g
- Trans Fat: 0 g
- Carbohydrates: 22 g
- Fiber: 1 g
- Protein: 38 g
- Cholesterol: 145 mg


")

